BONZZ'S PAGE OF ACHIEVEMENTS

CATEGORY: FAVORS OF FORTUNE

Will fortune shine on us with favors? Or will the Scorn become our slavers?-- Bonzz
 

--------------------------------------------------------------------

Search Bonzz's Site by typing a keyword(s) in the box below.


--------------------------------------------------------------------

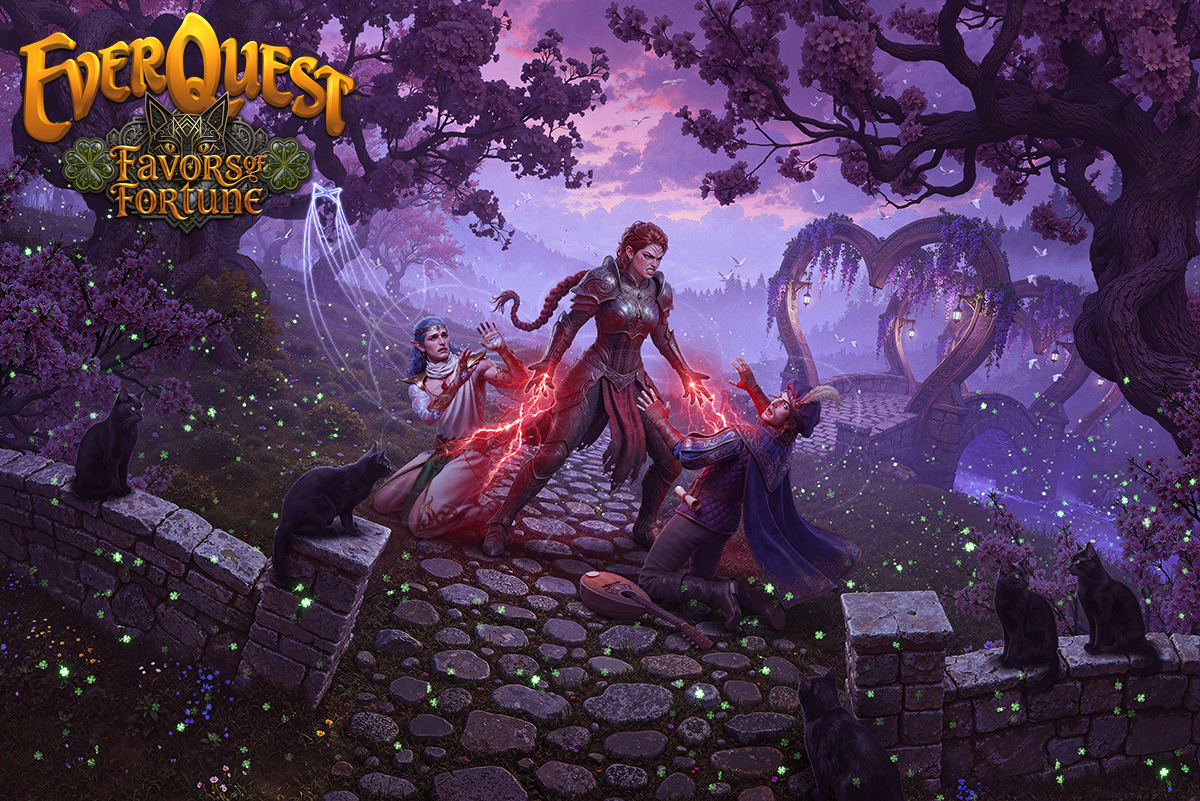
Favors of Fortune was the 33rd expansion of EverQuest, released December xxxx, 2026.

It included four (4) new missions and nine (9) new raids.

There were no pre-release events and no new Levels.

>>>>>>>>Change music<<<<<<<

..

Favors of Fortune added:
For more changes, modifications, fixes and additions that happened during this expansion, see the EQ Timeline.

--------------------------------------------------------------------

ACHIEVEMENT CATEGORIES & QUICK LINKS

Achievements listed in the below sections are not necessarily listed in alphabetical order. They are generally listed in the order seen in the game (at the time they were added to the lists below). Use Control-F to "Find" a specific achievement you may be looking for.

All of the the below achievements should apply to all classes (they are not class specific).

SUB-CATEGORY ACHIEVEMENT COUNT ACHIEVEMENT POINTS
General 10 560
Exploration 6 60
Special x xx
Quests 12 210
Missions 20 220
Raids 54 900
Hunter 9 245
Collections 36 585
TOTALS 147 2,780

EXPANSION INCLUSIONS & INFORMATION

ACHIEVEMENTS                   ALTERNATIVE CURRENCY                   ARMOR SETS                   CHASE LOOT                   GAME CREDITS

LORE                   MERC GEAR                   ORNAMENTS SETS                   PROGRESSIVE ITEM                   RAID INFO & STRATS

SPECIAL ITEM(S)                   SPELLS, DISCIPLINES & SONGS                   STAT FOOD & DRINK                   TRADESKILL RECIPES                   ZONES LIST

PREVIOUS EXPANSION                    BACK TO MAIN ACHIEVEMENTS PAGE                    NEXT EXPANSION

--------------------------------------------------------------------

EXPANSION INCLUSIONS & INFORMATION

The expansion was sold in four (4) versions: Family & Friends ($249.99); Premium ($139.99); Collector's ($69.99); and Standard ($34.99) editions.

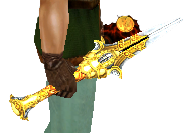
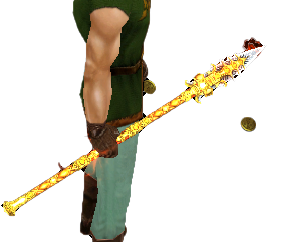
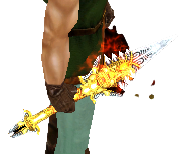
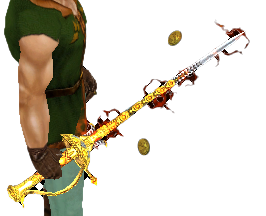
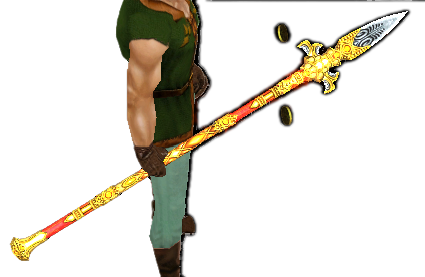
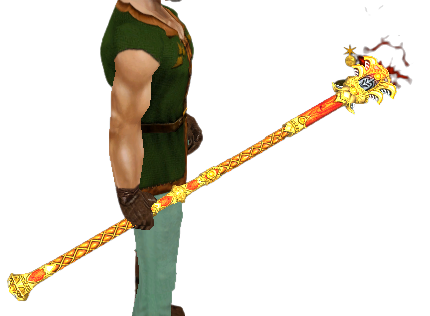
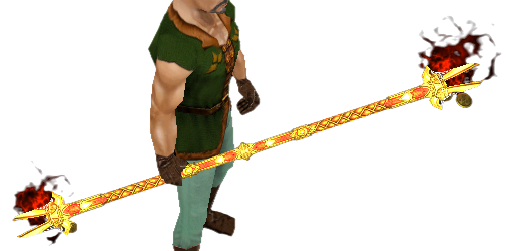
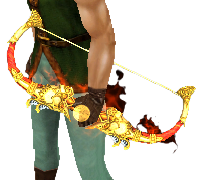
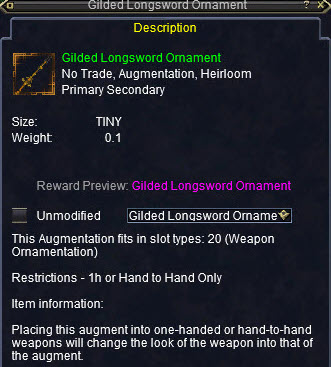
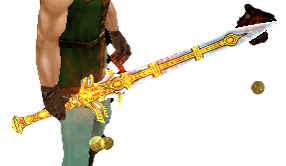
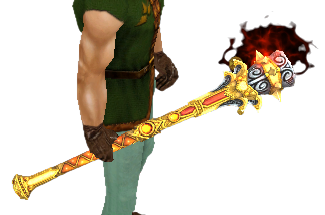
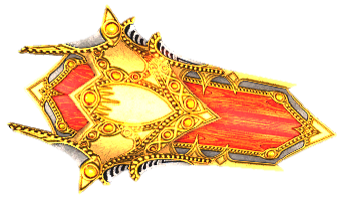
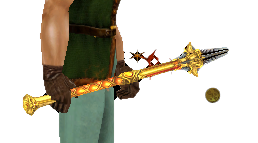
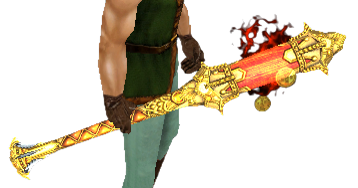
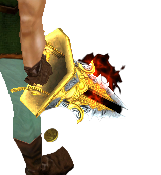
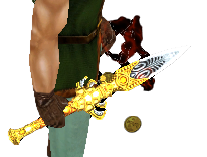
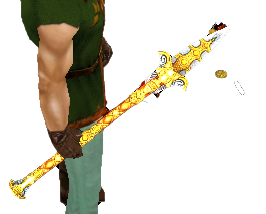
PRE-ORDER: If you Pre-Ordered (any version) you got three (3) Gilded Longsword Ornament (via /claim), that can be converted back and forth (via a button in the item window) between thirty (30) other ornaments (see below). You also got access to Beta, as a bonus.

STANDARD: This version did not include any Bonus Items.

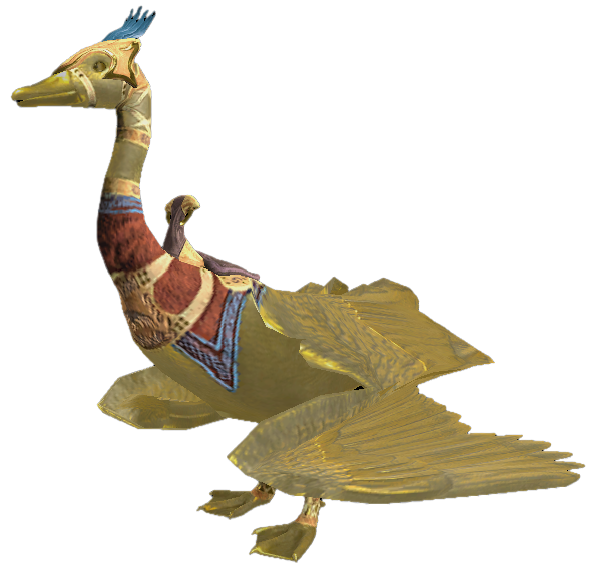
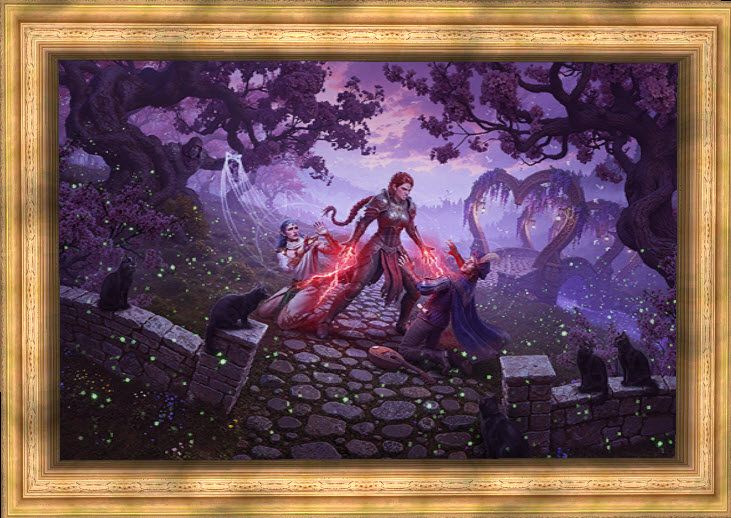
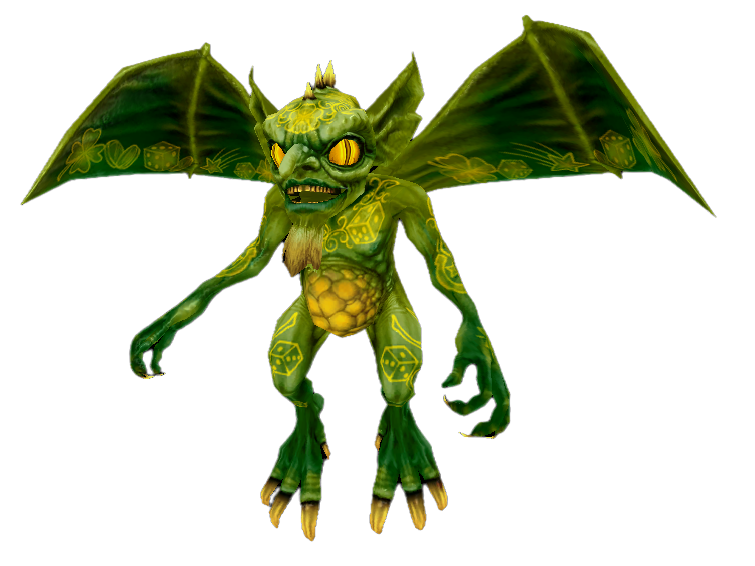
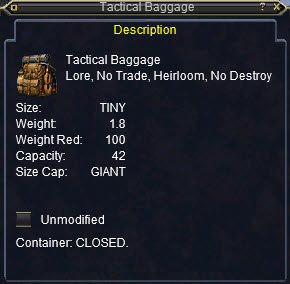
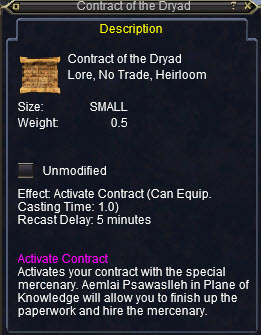
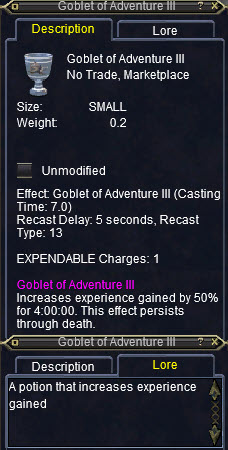
COLLECTOR'S: This version included: Contract of the Dryad (999) (Mercenary Type); Couple's Bench (Placeable / Personal Portal to Amaranth, Plane of Love); Collection Depot Slots (100); Goblet of Adventure III (x2); Painting: Fortune of Favors (placeable Painting); Tactical Baggage (42-Slot Bag); Golden Goose Whistle (Mount); & Metamorph Wand: Wagerling (Familiar).

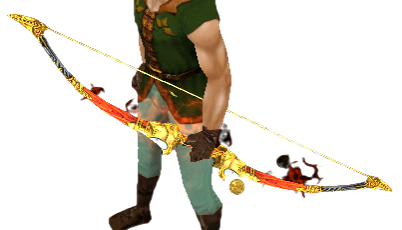
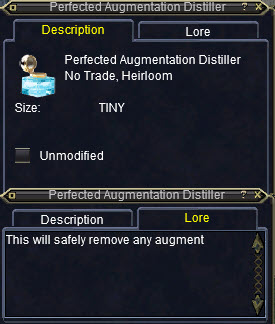
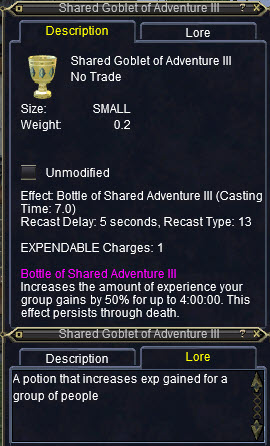
PREMIUM: This version additonally included: Contract of the Dryad (999) (Mercenary Type); Couple's Bench (Placeable / Personal Portal to Amaranth, Plane of Love); Lovely Topiary (Placeable Portal to Amaranth, Plane of Love); Collection Depot Slots (130); Goblet of Adventure III (x2); Painting: Fortune of Favors (placeable Painting); Tactical Baggage (42-Slot Bag x1); Golden Goose Whistle (Mount); Metamorph Wand: Wagerling (Familiar); Perfectied Augmentation Distiller (x10); Shared Goblet of Adventure III; Gilded Whirlwind (Mount); Metamorph: Monstrous Mirror (Familiar); & Visage of the Lucksworn (Illusion).

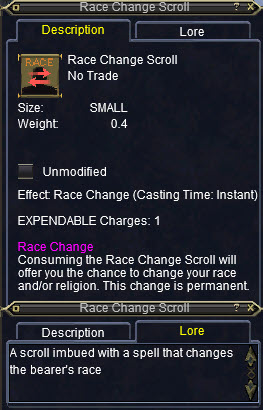
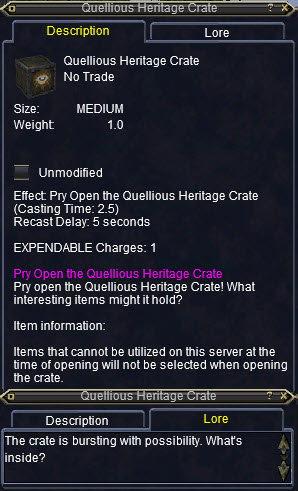
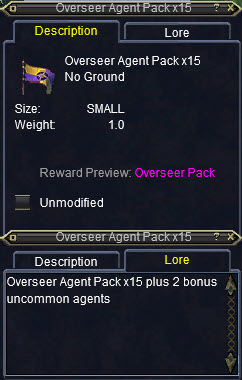
FAMILY & FRIENDS: This version additonally included: Contract of the Dryad (999) (Mercenary Type); Couple's Bench (Placeable / Personal Portal to Amaranth, Plane of Love); Lovely Topiary (Placeable Portal to Amaranth, Plane of Love);  Collection Depot Slots (180); Goblet of Adventure III (x2); Painting: Fortune of Favors (placeable Painting); Tactical Baggage (42-Slot Bag x3); Golden Goose Whistle (Mount); Metamorph Wand: Wagerling (Familiar); Perfectied Augmentation Distiller (x10); Shared Goblet of Adventure III; Gilded Whirlwind (Mount); Metamorph: Monstrous Mirror (Familiar); Visage of the Lucksworn (Illusion); Tradable: Favors of Fortune (Standard Expansion); Tradable Golden Goose Whistle (Mount); Tradable: Gilded Whirlwind (Mount); Tradable: Level 115 Heroic Character; Tradable: Collection Depot Slots (x5) (10-Slots Each); Overseer Agent Pack x15 (15 Common Agents & 2 Uncommon Agents); Quellious Heritage Crate; & Race Change Scroll.

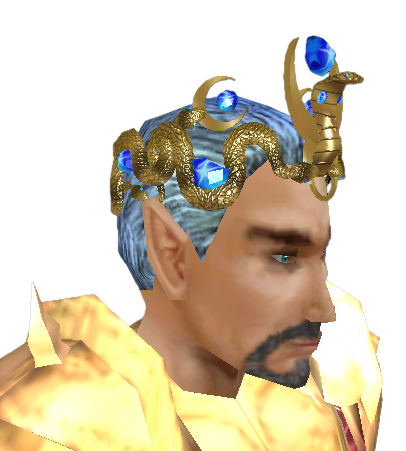
BETA: Players who participated in Beta and earned enough 'Beta Tokens' were awarded a Gilded Serpent Crown Ornament.

Race Change Scroll

Gilded Longsword Ornament

Tactical Baggage

Perfected Augmentation Distiller

Contract of the Dryad

Goblet of Adventure III

Quellious Heritage Crate

Shared Goblet of Adventure III

Overseer Agent Pack X15

T Expansion

T Goose

T Familiar

T 115

T Collection

T Whirlwind

x

Couple's Bench (x999)

(Portal) (Video)

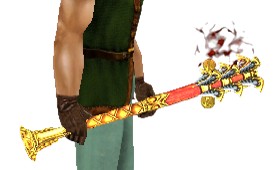
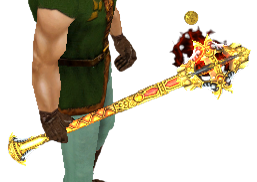
Gilded Longsword Ornament

(1H Weapon Ornament) (Video)

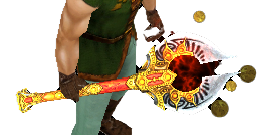
Gilded Axe Ornament

(1H Weapon Ornament) (Video)

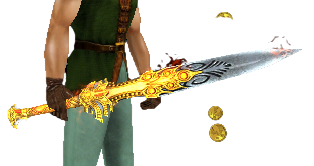
Gilded Broadsword Ornament

(1H Weapon Ornament) (Video)

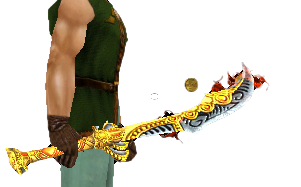
Gilded Falcata Ornament

(1H Weapon Ornament) (Video)

Gilded Scimitar Ornament

(1H Weapon Ornament) (Video)

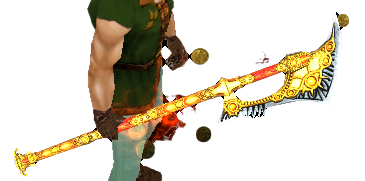
Gilded Bardiche Ornament

(2H Weapon Ornament) (Video)

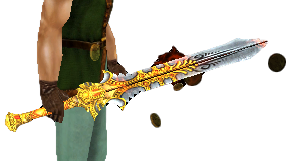
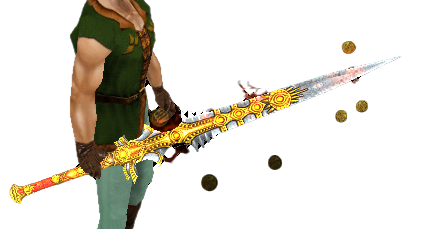
Gilded Greatsword Ornament

(2H Weapon Ornament) (Video)

Gilded Greataxe Ornament

(2H Weapon Ornament) (Video)

Gilded Hammer Ornament

(1H Weapon Ornament) (Video)

Gilded Mace Ornament

(1H Weapon Ornament) (Video)

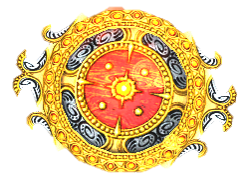
Gilded Tower Shield Ornament

(Shield Ornament) (Video)

Gilded Wand Ornament

(1H Weapon Ornament) (Video)

Gilded Spiked Mace Ornament

(1H Weapon Ornament) (Video)

Gilded Baton Ornament

(1H Weapon Ornament) (Video)

Gilded Flanged Mace Ornament

(1H Weapon Ornament) (Video)

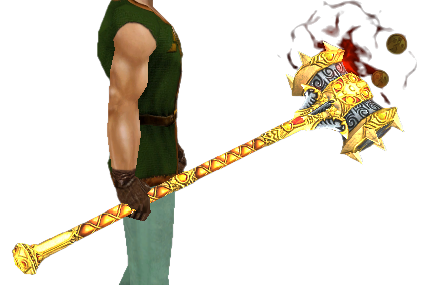
Gilded Maul Ornament

(2H Weapon Ornament) (Video)

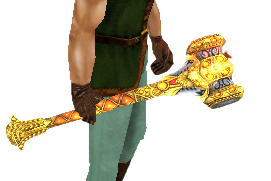
Gilded Lucern Hammer Ornament

(2H Weapon Ornament) (Video)

Gilded Knuckles Ornament

(1H Weapon Ornament) (Video)

Gilded Dagger Ornament

(1H Weapon Ornament) (Video)

Gilded Short Spear Ornament

(Expansion Pre-Order Item) (Video)


Gilded Injection Dagger Ornament

(1H Weapon Ornament) (Video)


Gilded Ritual Spear Ornament

(1H Weapon Ornament) (Video)


Gilded Athame Ornament

(1H Weapon Ornament) (Video)


Gilded Rapier Ornament

(Expansion Pre-Order Item) (Video)


Gilded Long Spear Ornament

(Expansion Pre-Order Item) (Video)


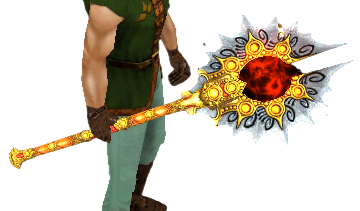
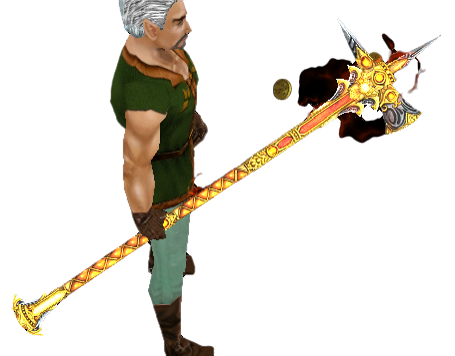
Gilded Arcane Staff Ornament

(2H Weapon Ornament) (Video)


Gilded Bo Staff Ornament

(2H Weapon Ornament) (Video)


Gilded Longbow Ornament

(Bow Ornament) (Video)


Gilded Short Bow Ornament

(Bow Ornament) (Video)


Gilded Buckler Ornament

(Shield Ornament) (Video)


Gilded Shield Ornament

(Shield Ornament) (Video)

Metamorph Wand: Monstrous Mirror

(Familiar / Pet Illusion) (Video)


Golden Goose Whistle

(Mount) (Video)


Painting: Favors of Fortune

(Placeable) (Video)


Metamorph Wand: Wagerling

(Familiar / Pet Illusion) (Video) 

x

Visage of the Lucksworn

(Illusion) (Video)


 x

Gilded Whirlwind

(Expansion Item) (Video)

 x

Lovely Topiary (x999)

(Placeable Portal) (Video)

x

Contract of the Dryad (x999)

(Tank Mercenary) (Video)


x

Contract of the Dryad (x999)

(Healer Mercenary) (Video)

 x

Contract of the Dryad (x999)

(DPS Melee Mercenary) (Video)

 x

Contract of the Dryad (x999)

(DPS Caster Mercenary) (Video)

 x

xxxxxxxxxxxxxxxxxxxxxxxxxxxx

(Expansion Item) (Video)

 x

xxxxxxxxxxxxxxxxxxxxxxxxxxxx

(Expansion Item) (Video)

x x x x 

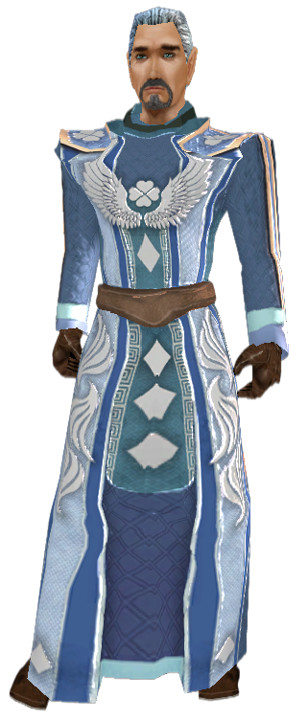
Lucky Chain (Video); Lucky Cloth (Video); Lucky Leather (Video); Lucky Plate (Video); Lucky Cloth Robe (Video)

Lucky Ornament Sets (Group Vendor)

x x x x x

Greedy Chain (Video); Greedy Cloth (Video); Greedy Leather (Video); Greedy Plate (Video); Greedy Cloth Robe (Video)

Greedy Ornament Sets (Group)

x x x x x

Lovely Chain (Video); Lovely Cloth (Video); Lovely Leather (Video); Lovely Plate (Video); Lovely Cloth Robe (Video)

Lovely Ornament Sets (Raid)

Gilded Serpent Crown Ornament

(Beta Reward) (Video)

BACK TO TOP

--------------------------------------------------------------------

SPECIAL EXPANSION ITEM(S)

BACK TO TOP

--------------------------------------------------------------------

RECIPES

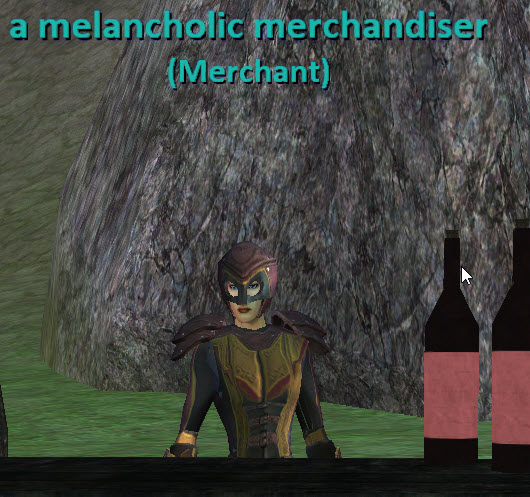
The Favors of Fortune recipe books, along with certain new and old tradeskill items, are sold by an melancholic merchandizer in Amaranth, Plane of Love (on Find).

BACK TO TOP

--------------------------------------------------------------------

STAT FOOD & DRINK

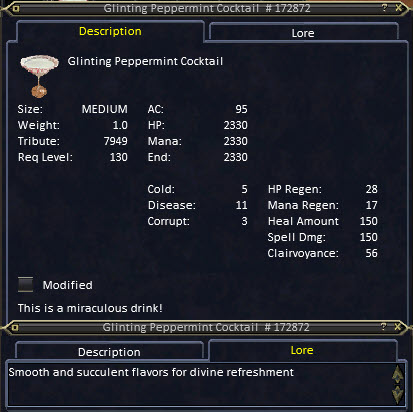
This expansions Player crafted stat drink is Glinting Peppermint Cocktail.

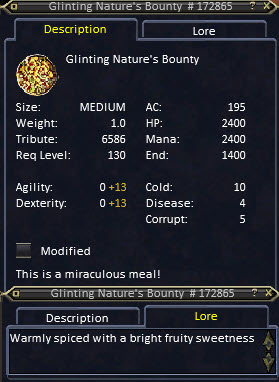
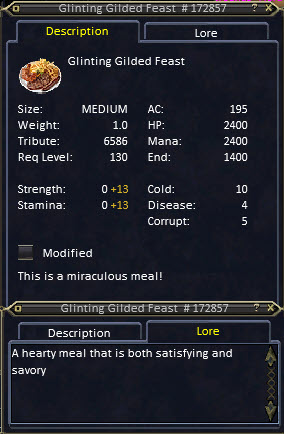
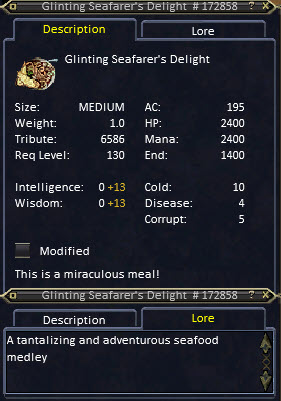
This expansions Player crafted stat food has three (3) variants... Glinting Nature's Bounty (AGI & DEX overcaps) & Glinting Gilded Feast (STR & STA overcaps) & Glinting Seafarer's Delight (INT & WIS overcaps).
BACK TO TOP

--------------------------------------------------------------------

COIN

Images

BACK TO TOP

--------------------------------------------------------------------

SPELLS, DISCIPLINES & SONGS

--------------------------------------------------------------------

EXPANSION ARMOR SETS

Depending on which gear set you are making, they can require one (1) or more other items that are either dropped, crafted or sold by vendors. These items are combined inside a combine container (which is also dropped or crafted) to make the actual armor. As a note, weapons and non-visible items can also be crafted in similar fashion, as noted below.

The armor sets and the materials needed are:

BACK TO TOP

--------------------------------------------------------------------

PROGRESSIVE ITEM

The 'Cloak of Fortune's Fool' is a progressive cloak item, attached to Experience, Quests, Missions, Raids & Achievements.

The quest series is outlined here.

BACK TO TOP

--------------------------------------------------------------------

MERC GEAR

There was no new Merc Gear. However, there were new Merc AA's... three (3) each of improved Health & Improved Mana; and two (2) each of Improved Melee Defense & Improved Spell Resistance.

BACK TO TOP

--------------------------------------------------------------------

CHASE LOOT

There was no new chase loot.

However, the same 'Unbound Radiance' items from The Shattering of Ro should have a chance of dropping.

BACK TO TOP

--------------------------------------------------------------------

ORNAMENT SETS

The Hero's Forge Ornament sets for this expansion were:

See top of page for images.

BACK TO TOP

-------------------------------------------------------------------

THE FAVORS OF FORTUNE ZONES

The starting zone (Amaranth, Plane of Love).

The new zones can be accessed via the Plane of Tranquility; Erudin; via the Guild Hall portal (xxxxx); or via the clicky portals that came with expansion pack(s) (see top of page).

Amaranth, Plane of Love

Avarice, Plane of Greed

Averness, Plane of Guile

Bedlam, Plane of Madness

Emberheart, Plane of Desire

Serendyl, Plane of Luck

BACK TO TOP OF CATEGORY                         BACK TO TOP OF PAGE

--------------------------------------------------------------------

ACHIEVEMENTS

NOTE: Any rewards highlighted in YELLOW might be worth pursuing, due the fun factor, benefit or usefulness of the reward (you decide).

NOTE: Some miscellaneous “hints” may also be included in PURPLE. These hints are intended to enhance / clarify the "how to" for accomplishing the achievement.

NOTE: Anything in RED text is either an informational or data / details that are not fully verified. If you can verify or provide correct information, please do (see end of page)!

NOTE: Items noted as a "REWARD" are items granted from the achievement, itself. Items listed as "ACQUIRED" are unique item's that can be / are / should be acquired along the way, towards completing the related achievement, but are not actually a reward granted from the achievement itself. In fact, the achievement may even be for acquiring said item. Additionally, only the more 'unique' Achievement awards are noted below... 'common' or 'generic' Achievement Rewards like Alternate Advancement points, Character Experience & Coin, are not noted in the reward options below.

GENERAL

NAME

POINTS NOTES REWARD(S)
Master of Favors of Fortune 100 Complete the two (2) listed achievements. N / A
 xxxxxx 60 Complete the two (2) listed Achievements. (Mount), Titles 
 xxxxxx 60 Complete the three (3) listed Achievements. Bag, Titles 
Explorer of Favors of Fortune 20 Complete the six (6) listed Achievements.  If you don't have one all ready, you should get a Journeyman's Compass. Click the Journeyman's Compass to gain another Level of the Journeyman's Speed Alternative Advancement (if it isn't all ready maxed out).
Champion of Favors of Fortune 40 Complete the twelve (12) listed Achievements. N / A
Paragon of Favors of Fortune 40 Complete the four (4) listed Achievements. Familiar
Challenger of Favors of Fortune 60 Complete the four (4) listed Achievements to include the nine (9) listed required sub-Achievements). Unlock Item
Conqueror of Favors of Fortune 60 Complete the nine (9) listed Achievements. N / A
Vanquisher of Favors of Fortune 80 Complete the nine (9) listed Achievements to include the thirty-six (36) listed required sub-Achievements).  Overcap Aug 
xxxxxx 40 Complete the six (6) listed Achievements.  Trophy, Bag & Titles

BACK TO TOP OF CATEGORY                         BACK TO TOP OF PAGE

--------------------------------------------------------------------

EXPLORATION

NAME

POINTS NOTES
Amaranth, Plane of Love Traveler 10 Go to the noted zone.
Emberheart, Plane of Desire Traveler 10 Go to the noted zone.
Avarice, Plane of Greed Traveler  10 Go to the noted zone.
 Bedlam, Plane of Madness Traveler 10 Go to the noted zone.
 Serendyl, Plane of Luck Traveler 10 Go to the noted zone.
 Averness, Plane of Guile Traveler 10 Go to the noted zone.

BACK TO TOP OF CATEGORY                         BACK TO TOP OF PAGE

--------------------------------------------------------------------

SPECIAL

NAME

POINTS NOTES REWARD(S)
 xxxxxxxxxxxxxxxxx    Complete the eight listed tasks (outlinedhere). Acquire & progress the 'Cloak of Fortune's Fool.'

BACK TO TOP OF CATEGORY                         BACK TO TOP OF PAGE

--------------------------------------------------------------------

QUESTS

NAME

POINTS NOTES
Mercenary of Amaranth, Plane of Love 20 Complete the four (4) listed tasks.
Partisan of Amaranth, Plane of Love 15 Complete the three (3) listed tasks.
Mercenary of Emberheart, Plane of Desire 15 Complete the three (3) listed tasks.
Partisan of Emberheart, Plane of Desire 15 Complete the three (3) listed tasks.
Mercenary of Avarice, Plane of Greed 25 Complete the five (5) listed tasks.
Partisan of Avarice, Plane of Greed 30 Complete the six (6) listed tasks.
Mercenary of Bedlam, Plane of Madness 15 Complete the three (3) listed tasks.
Partisan of Bedlam, Plane of Madness 15 Complete the three (3) listed tasks.
Mercenary of Serendyl, Plane of Luck 15 Complete the three (3) listed tasks.
Partisan of Serendyl, Plane of Luck 15 Complete the three (3) listed tasks.
Mercenary of Averness, Plane of Guile 15 Complete the three (3) listed tasks.
Partisan of Averness, Plane of Guile 15 Complete the three (3) listed tasks.

BACK TO TOP OF CATEGORY                         BACK TO TOP OF PAGE

--------------------------------------------------------------------

MISSIONS

All of the Mission Achievements, that do not credit until the Chest is opened, can be acquired via a Task Add. Task Added Players will get credit when the mission chest is opened. They will get credit no matter where they are. They do not have to be in zone.

NAME

POINTS NOTES REWARD(S)
Hero of Plane of Love: Queen of Thorns 10 Defeat the listed Mission. ???
Savior of Plane of Love: Queen of Thorns 15 Complete the three (3) listed Achievements. ???
Queen of Thorns: xxxxx 10    N / A
Hero of Plane of Greed: The Doorman 10 Defeat the listed Mission.  ???
Savior of Plane of Greed: The Doorman 15  Complete the three (3) listed Achievements. ???
The Doorman: xxxxx 10   N / A 
Hero of Plane of Luck: Xev Tests Fate 10 Defeat the listed Mission.  ???
Savior of Plane of Luck: Xev Tests Fate 15  Complete the three (3) listed Achievements. ???
Xev Tests Fate: xxxxx 10   N / A 
Hero of Plane of Guile: Affirmation of Zek 10 Defeat the listed Mission.  ???
Savior of Plane of Guile: Affirmation of Zek 15  Complete the three (3) listed Achievements. ???
Affirmation of Zek: xxxxx 10   N / A 

BACK TO TOP OF CATEGORY                         BACK TO TOP OF PAGE

--------------------------------------------------------------------

RAIDS

NAME

POINTS NOTES
Conqueror of Plane of Love: Queen of Thorns 20 Defeat the listed raid.
 Vanquisher of Plane of Love: Queen of Thorns 40 Complete the four (4) listed Achievements.
Queen of Thorns: Defending Desire 10  
 Queen of Thorns: Proper Footwork 10  
 Queen of Thorns: Captivating Scorn 10  
 Queen of Thorns: Enraged 10

Defeat the noted Raid after selecting the 'Enraged' option.

This means the event will start in enraged mode right away and some bonus loot will drop.

Conqueror of Plane of Desire: Siren Sisters 20 Defeat the listed raid.
Vanquisher of Plane of Love: Siren Sisters 40 Complete the four (4) listed Achievements.
Siren Sisters: Shared Affection 10  
Siren Sisters: Picking Favorites 10  
Siren Sisters: Fanatic Poaching 10  
Siren Sisters: Enraged 10

Defeat the noted Raid after selecting the 'Enraged' option.

This means the event will start in enraged mode right away and some bonus loot will drop.

Conqueror of Plane of Desire: Dipuc, General of Scorn 20 Defeat the listed raid.
 Vanquisher of Plane of Desire: Dipuc, General of Scorn 40 Complete the four (4) listed Achievements.
Dipuc, General of Scorn: Shattered Art 10  
Dipuc, General of Scorn: Devastating Love 10  
Dipuc, General of Scorn: Love Lost 10  
Dipuc, General of Scorn: Enraged 10

Defeat the noted Raid after selecting the 'Enraged' option.

This means the event will start in enraged mode right away and some bonus loot will drop.

Conqueror of Plane of Greed: Moruuk and Sorshkah 20 Defeat the listed raid.
Vanquisher of Plane of Greed: Moruuk and Sorshkah 40 Complete the four (4) listed Achievements.
Moruuk and Sorshkah: Expedient 10  
Moruuk and Sorshkah: The Portal Greed 10  
Moruuk and Sorshkah: Charming Extermination 10  
Moruuk and Sorshkah; Enraged 10

Defeat the noted Raid after selecting the 'Enraged' option.

This means the event will start in enraged mode right away and some bonus loot will drop.

Conqueror of Plane of Greed: The Doorman 20 Defeat the listed raid.
Vanquisher of Plane of Greed: The Doorman 40 Complete the four (4) listed Achievements.
The Doorman: Threat Escalation 10  
The Doorman: Threat Mitigation 10  
The Doorman: reserve List 10  
The Doorman: Enraged 10

Defeat the noted Raid after selecting the 'Enraged' option.

This means the event will start in enraged mode right away and some bonus loot will drop.

Conqueror of Plane of Madness: Fractured Vazaelle 20 Defeat the listed raid.
Vanquisher of Plane of Madness: Fractured Vazaelle 40 Complete the four (4) listed Achievements.
Fractured Vazaelle: In Control 10  
Fractured Vazaelle: Give in to Madness 10  
Fractured Vazaelle: Growing Affliction 10  
Fractured Vazaelle: Enraged 10

Defeat the noted Raid after selecting the 'Enraged' option.

This means the event will start in enraged mode right away and some bonus loot will drop.

Conqueror of Plane of Luck: Xev Tests Fate 20 Defeat the listed raid.
 Vanquisher of Plane of Luck: Xev Tests Fate 40 Complete the four (4) listed Achievements.
Xev Tests Fate: All In 10  
Xev Tests Fate: Eye on the Prize 10  
Xev Tests Fate: Game of Memory 10  
Xev Tests Fate: Enraged 10

Defeat the noted Raid after selecting the 'Enraged' option.

This means the event will start in enraged mode right away and some bonus loot will drop.

Conqueror of Plane of Averness, Plane of Guile: Chronicles of War 20 Defeat the listed raid.
Vanquisher of Plane of Averness, Plane of Guile: Chronicles of War 40 Complete the four (4) listed Achievements.
Chronicles of War: Deja Vu 10  
Chronicles of War: Handled It 10  
Chronicles of War: Enrage 10  
Chronicles of War: Enraged 10

Defeat the noted Raid after selecting the 'Enraged' option.

This means the event will start in enraged mode right away and some bonus loot will drop.

Conqueror of Plane of Averness, Plane of Guile: Affirmation of Zek 20 Defeat the listed raid.
Vanquisher of Plane of Averness, Plane of Guile: Affirmation of Zek 40 Complete the four (4) listed Achievements.
Affirmation of Zek: Racked and Ready 10  
Affirmation of Zek: Blacksmith's Bounty 10  
Affirmation of Zek: Empty Armory 10  
Affirmation of Zek: Enraged 10

Defeat the noted Raid after selecting the 'Enraged' option.

This means the event will start in enraged mode right away and some bonus loot will drop.

BACK TO TOP OF CATEGORY                         BACK TO TOP OF PAGE

--------------------------------------------------------------------

HUNTER

Hunter Achievements do not require you to be in zone. Just be in the group / raid and you will get credit for the Hunter kill, no matter where you are.

NAME

POINTS NOTES REWARD(S)
Novice Favors of Fortune Hunter 30 Complete the two (2) listed Achievements. Bag
Hunter of Amaranth, Plane of Love 25 Defeat the ten (10) listed targets. N / A
Hunter of Emberheart, Plane of Desire 25 Defeat the ten (10) listed targets. N / A
Adept Favors of Fortune Hunter 40 Complete the two (2) listed Achievements. Bag
Hunter of Avarice, Plane of Greed 20 Defeat the eight (8) listed targets. N / A
Hunter of Bedlam, Plane of Madness 20 Defeat the eight (8) listed targets. N / A
Veteran Favors of Fortune Hunter 50 Complete the two (2) listed Achievements. Bag
Hunter of Serendyl, Plane of Luck 20 Defeat the eight (8) listed targets. N / A
Hunter of Averness, Plane of Guile 25 Defeat the xxx (xx) listed targets. N / A

BACK TO TOP OF CATEGORY                         BACK TO TOP OF PAGE

--------------------------------------------------------------------

COLLECTIONS

NAME

POINTS NOTES
xxxxxx 25  
Amaranth, Plane of Love Scavenger 20 Complete the four (4) listed Achievements.
xxxxxx 10

Acquire and collect the eight (8) listed items.

These....

xxxxxx 10

Acquire and collect the eight (8) listed items.

These....

xxxxxx 10

Acquire and collect the eight (8) listed items.

These....

xxxxxx 10

Acquire and collect the eight (8) listed items.

These....

xxxxxx 30  
Emberheart, Plane of Desire Scavenger  20 Complete the four (4) listed Achievements.
xxxxxx 10

Acquire and collect the eight (8) listed items.

These....

xxxxxx 10

Acquire and collect the eight (8) listed items.

These....

xxxxxx 10

Acquire and collect the eight (8) listed items.

These....

xxxxxx 10

Acquire and collect the eight (8) listed items.

These....

Aquisition 35  
Avarice, Plane of Greed Scavenger 20 Complete the four (4) listed Achievements.
Failed Schemes 10

Acquire and collect the eight (8) listed items.

These....

Costume Jewelry 10

Acquire and collect the eight (8) listed items.

These....

Makeshift Weapons 10

Acquire and collect the eight (8) listed items.

These....

Norrathian Coin Collection 10

Acquire and collect the eight (8) listed items.

These....

Keep Sanes 40  
Bedlam, Plane of Madness Scavenger 20 Complete the four (4) listed Achievements.
Mad to the Bone 10

Acquire and collect the eight (8) listed items.

These....

Signed, Your Sanity 10

Acquire and collect the eight (8) listed items.

These....

Liquid Assets 10

Acquire and collect the eight (8) listed items.

These....

Lost in Madness 10

Acquire and collect the eight (8) listed items.

These....

xxxxxx 45  
Serendyl, Plane of Luck Scavenger 20 Complete the four (4) listed Achievements.
Seeds of Fortune 10

Acquire and collect the eight (8) listed items.

These....

Stones of Serendipity 10

Acquire and collect the eight (8) listed items.

These....

Gambler's Keepsakes 10

Acquire and collect the eight (8) listed items.

These....

Remnants of Wagered Fate 10

Acquire and collect the eight (8) listed items.

These....

xxxxxx 50

Acquire and collect the eight (8) listed items.

These....

Averness, Plane of Guile Scavenger 20 Complete the four (4) listed Achievements.
xxxxxx 10

Acquire and collect the eight (8) listed items.

These....

xxxxxx 10

Acquire and collect the eight (8) listed items.

These....

xxxxxx 10

Acquire and collect the eight (8) listed items.

These....

xxxxxx 10

Acquire and collect the eight (8) listed items.

These....

BACK TO TOP OF CATEGORY                         BACK TO TOP OF PAGE

--------------------------------------------------------------------

RAID INFO & STRATS

The generic strats / info below are from Dev Beta notes, successful raids that I was part of, from what I recall  and / or from research. The below info does not include details on how to complete raid-related achievements. Those are noted elsewhere on this page, if any. The below info should be adapted, as seen fit, by your Raid Leader. Raid make-up (classes, levels, Player skill levels, etc.) can and do make a difference on raid strategy options and winning or losing. In any situation, Key emotes may also be noted below. Players fulfilling their roles, using assist, and following emotes is always essential. There is all most always more than one variant strategy that can successfully defeat a raid. As Levels increase, defeating old raids can prove much easier and more forgiving (potentially even as a group or solo / molo, depending on how old the raid event is). However, sometimes, certain mechanics still have to be honored. It has been known that in some events, due to such raid mechanics (i.e. too much DPS; killing MoB X before MOB Y; and similar) can bug the raid and cause it to fail. Some of these targets may require 'zerging' into the zone get to them (kill stuff along the way). They may also have 'adds' which are normally more like 'trash' MoB's. The original / older targets / encounters were pre-raid window events. Raids were more of a collective effort, or better, an extremely challenging group event. Any effects noted below  can sometimes 'scale to level,' so the effects can be lesser or greater than stated, depending on raid force character levels. On Progression servers, targets can use 'Mitigation of the Mighty' (mitigates Spell, Melee & DoT Damage), at least until such time as certain later expansions unlock, which is typically at least seven-plus expansions after the expansion of the related target. While older targets are static open-world (non-instance) events, there are now an Agent of Change in various locations that will offer an instanced version of those same events (noted below, if any).

Queen of Thorns (Tier 1)         Siren Sisters (Tier 1)

Dipuc, General of Scorn (Tier 2)         Moruuk and Sorshkah (Tier 2)          The Doorman (Tier 2)          Fractured Vazaelle (Tier 2)

Xev Tests Fate (Tier 3)         Chronicles of War (Tier 3)          Affirmation of Zek (Tier 3)

If I missed anything or got something wrong, let me know!

QUEEN OF THORNS (Tier 1)

From Canotia in Amaranth, Plane of Love, key word 'xxxxx.'

After a devastating betrayal Erollisi Marr once again took on the mantle of Scorn, Queen of Thorns. She has taken Tholuxe captive and intends to punish them for their role in the betrayal.

Encounter Overview

Scorn is a three stage encounter that centers around confronting The Queen of Thorns while protecting Tholuxe Paells, who is attempting to help the players break Erollisi Marr free from her wrathful side.
Goddess of Love: Scorn is just another facet of Erollisi Marr, the Goddess of Love
Master Archer: The Queen of Thorns is a master archer with an arsenal of arrows
Tholuxe's 'Help': Tholuxe Paells attempts to help the player, but something is wrong and their assistance will often feel like a detriment

This is a 54-player raid for groups with gear from the latest expansion.

Stage 1 (100% - 81%)

Overview
Scorn starts the encounter by wrapping Tholuxe Paells in a layer of thick thorns, dealing persistent damage to them throughout the encounter, while leaning heavily into her mastery of archery by rapid firing arrows at targets around the arena. Meanwhile Tholuxe attempts to help the players but sometimes things just seem to go wrong. Bramble Sentinels accompany Scorn, silencing players and Tholuxe if they are too close to them.


Mechanics

Scorn - Rapid Fire:
Occurs every 120 seconds
Targets 15 players

Tholuxe Paells - 'Help':
Every 75 seconds Tholuxe will attempt to help
Help comes in the form of one of the following spells based on their remaining health:
HP >= 65%
Invigorating Essence - Mana Regen & Endurance Regen
Quickened Reflexes - Increased Melee Attack Speed, Increased Spell Casting Speed
HP >= 50%
Protective Embrace - Spell Guard, Melee Guard, DoT Guard
Gift of Giving - Increased Healing %
Briar Shackles - Reduced Movement
HP >= 35%
Draining Touch - Reduce Dmg Dealt (Spell and Skill)
HP >= 15%
Sapping Buds - Reduce Healing %
HP >= 0%
Languorous Runes - Increased Mana Cost

Bramble Sentinels:
Spawn every 90 seconds
Players that get too close to them will be silenced
If a sentinel is brought too close to Tholuxe they will be silenced and unable to 'help'
Bramble Sentinels can be charmed

Strategy: Keep Tholuxe's health above 65% (if Tholuxe's health drops to 0, game over) to ensure the best odds at receiving a positive buff. Manage adds and heal through Scorn's rapid fire.

Stage 2 (80% - 40%)

Overview
Scorn wraps herself in a bramble shield that reflects damage and spells while Tholuxe continues to help and now starts to draw unwanted attention.

Mechanics

Scorn - Rapid Fire Burst:
Occurs every 120 seconds
Targets 15 players
Targeted players will now deal AoE damage around them

Scorn - Bramble Shield:
Reflects damage and spells
When a charmed Bramble Sentinel hits Scorn it is killed and the shield is dispelled for 30 seconds

Tholuxe Paells - 'Help':
Tholuxe continues to 'help' the players

Tholuxe Paells - Unwanted Attention:
After being held captive for so long, Tholuxe is starting to grow tired and losing control of their powers
As the personification of desire itself they are started to get unwanted attention and taunting the Bramble Sentinels

Bramble Sentinels:
Spawn every 90 seconds
Players that get too close to them will be silenced
If a sentinel is brought too close to Tholuxe they will be silenced and unable to 'help'
Bramble Sentinels that hit Tholuxe Paells will apply a reduced healing received debuff on them
Bramble Sentinels can be charmed

Strategy: Spread for the rapid fire burst, control adds by charming them and creating 'burn windows' when they bring down Scorn's shield.

Stage 3 (40% - 0%)

Overview

All of Scorn and the Bramble Sentinels' previous mechanics continue, but now Scorn's Rapid Fire Burst will charm players caught in the AoE. Tholuxe Paells has completely lost control of their power and their help changes drastically.

Mechanics

Scorn - Rapid Fire Burst:
Occurs every 120 seconds
Targets 15 players
Targeted players will now deal AoE damage around them
Players caught in the AoE are charmed

Scorn - Bramble Shield:
Reflects damage and spells
When a charmed Bramble Sentinel hits Scorn it is killed and the shield is dispelled for 30 seconds

Tholuxe Paells - 'Help':
Tholuxe will create two zones
A random number of players will be selected and be given either a buff or debuff
Players with the buff will need to move to one zone
Players that enter this zone will have their buff removed, but be given an even more powerful buff
Players with the debuff will need to move to the other zone
Players that enter this zone will have the debuff removed
If a player enters the wrong zone they will detonate causing a large amount of AoE dmg to the raid and be charmed
Players that fail to remove their buff or debuff will be punished

Tholuxe Paells - Unwanted Attention:
After being held captive for so long, Tholuxe is starting to grow tired and losing control of their powers
As the personification of desire itself they are started to get unwanted attention and taunting the Bramble Sentinels

Bramble Sentinels:
Spawn every 90 seconds
Players that get too close to them will be silenced
If a sentinel is brought too close to Tholuxe they will be silenced and unable to 'help'
Bramble Sentinels that hit Tholuxe Paells will apply a reduced healing received debuff on them
Bramble Sentinels can be charmed
Strategy: Spread for the rapid fire burst, control adds by charming them and creating 'burn windows' when they bring down Scorn's shield, pay attention to which buff you have an move to the appropriate zone.

Achievements

Complete additional challenges for special recognition:
Defending Desire: Never let Tholuxe Paells fall below 50% life
Proper Footwork: Never detonate the wrong buff / debuff
Captivating Scorn: Charm 15 or more bramble sentinels

Key Mechanics Summary

Mechanic Effect
Rapid Fire Burst Single Target Damage and PBAE damage
Coerced Loyalty Part of the Stage 3 Rapid Fire Burst, charms targets caught int he AoE
Stolen Words AoE Silence centered around the Bramble Sentinels
Bramble Shield Reflects Dmg and Spells
Lucky in Life Tholuxe helps the player by increasing their dmg and providing mana and endurance regen, but if not taken to the correct zone will result in consequences
Unlucky in Life Tholuxe attempts to help the player, but curses them instead reducing their dmg

EMOTE: 

EMOTE: 

EMOTE: 

EMOTE: 

EMOTE: 

EMOTE: 

EMOTE: 

EMOTE: 

EMOTE: 

SIREN SISTERS - (Tier 1)

From Uldrek in Emberheart, Plane of Desire, key word 'xxxxx.'

Three sirens are taking advantage of the chaos in the Plane of Desire by drawing in artists with promises of inspiration. Desperate for relief from their creative block they seek out the sisters and instead of finding salvation they are ambushed and drained of their creative essence by the bickering sisters.

Encounter Overview
The Siren Sisters is a single stage fight where all three sirens are active at the same time. Each siren seeks the adoration of everyone around them and based on the amount of attention they receive will (or don't receive) they will grow ever more angry and frustrated. Players can show their affection by standing near the siren of their choosing, cooling them down. Be careful how much attention you give to one siren as their attention comes at a cost.
The Singer, Mella're: Draws inspiration from and feasts on the voices of others
The Poet, Era'mi: The pen is mighty than the sword and her verses are stunning
The Musician, Calli'do: Her melodies will make you want to plant your feet and bang your head

This is a 54-player raid for groups with gear from the latest expansion.

Stage 1 (100% - 0%)

Overview
Scorn starts the encounter by wrapping Tholuxe Paells in a layer of thick thorns, dealing persistent damage to them throughout the encounter, while leaning heavily into her mastery of archery by rapid firing arrows at targets around the arena. Meanwhile Tholuxe attempts to help the players but sometimes things just seem to go wrong. Bramble Sentinels accompany Scorn, silencing players and Tholuxe if they are too close to them.
The Siren Sisters start the encounter spread and do not move from starting locations. Each sister will vie for your attention by offering protection from one of the elements. Show them your affection by standing close, reducing their anger, but drawing their attention. Be warned, you are not the only one drawn in by the sisters' presence.

Mechanics

Mella're
Soothing Ballad:
Protects nearby players, reducing dmg taken by Calli'do's spells
Shrill Chorus:
Occurs every 90 seconds
Pulse AoE dmg - entire raid
Dmg is based on Mella're's anger level
At anger level 4 pulse will also silence players
Lingering Hymn:
Occurs every 7% life
Targets a number of random players based on anger level
More players at lower anger levels
Deals dmg and silences targeted players

Era'mi
Empowering Rhetoric:
Protects nearby players, reducing dmg taken by Mella're's spells
Cutting Verse:
Occurs every 90 seconds
Pulse AoE dmg - entire raid
Dmg is based on Mella're's anger level
At anger level 4 pulse will also put players to sleep (stun)
Biting Sonnet:
Occurs every 7% life
Targets a number of random players based on anger level
More players at lower anger levels
Deals dmg and sleeps (stuns) targeted players

Calli'do
Tranquil Rhythm:
Protects nearby players, reducing dmg taken by Era'mi's spells
Discordant Melody:
Occurs every 90 seconds
Pulse AoE dmg - entire raid
Dmg is based on Mella're's anger level
At anger level 4 pulse will also slow players
Cacophonous Note:
Occurs every 7% life
Targets a number of random players based on anger level
More players at lower anger levels
Deals dmg and slows targeted players
Fans and Devotees:
Throughout the fight the siren sisters will be joined by their fans and devotees. Some of them can be controlled while others can not.

Strategy: Pay attention to the siren sister's anger levels and avoid allowing any of them to get to 4. Control the adds that spawn throughout the encounter and prepare for health based damage.

Achievements

Complete additional challenges for special recognition:
Shared Affection: Never allow a siren sister get to max anger
Picking Favorites: Allow two siren sisters get to max anger
Fanatic Poaching: Use a single target mez on at least five of each of the siren sister’s fans

Key Mechanics Summary

Mechanic Effect
Shrill Chorus Pulse of increasing dmg based on Mella're's anger level. At anger level 4 silences
Cutting Verse Pulse of increasing dmg based on Era'mi's anger level. At anger level 4 stuns
Discordant Melody Pulse of increasing dmg based on Calli'do's anger level. At anger level 4 slows

EMOTE: 

EMOTE: 

EMOTE: 

EMOTE: 

EMOTE: 

EMOTE: 

EMOTE: 

EMOTE: 

EMOTE: 

DIPUC, GENERAL OF SCORN (Tier 2)

From Uldrek in Emberheart, Plane of Desire, key word 'xxxxx.'

Initially ordered by Scorn, Queen of Thorns, to take control of the Plane of Desire, General Dipuc was aggressive and methodical, but further destabilized the realm. New orders have been given, but the general is ignoring them and appears to have gone rogue.

Encounter Overview
Dipuc is a three stage encounter the revolves around dodging attacks, destroying statues with boss mechanics before they become active, and coordinating the placement of auras.
Master Archer: Much like his queen, Dipuc is a master with the bow
Statues: Scorn's influence is seeping into the very fabric of realm and bringing it to life
General: Every general commands troops

This is a 54-player raid for groups with gear from the latest expansion.

Stage 1 (100% - 76%)

Overview
Dipuc, overconfident he can handle the situation, fights alone, relying on his skill with the bow to vanquish the foes in front of him.

Mechanics

Dipuc
Piercing Shot:
Occurs every 60 seconds
Teleports to a location
Fires a piercing shot that must be avoided

Strategy: Mechanics light stage. Burn the boss and avoid the line.

Stage 2 (75% - 56%)

Overview
Taking the fight more seriously Dipuc digs deeper into his arsenal and calls on the aid of his soldiers.

Mechanics

Dipuc
Piercing Shot:
Continues
Shatter Shot:
Occurs every 100 seconds
Targets a player with a cluster of arrows
When the arrows impact they splinter and fire off in different directions
Will destroy the statues around the room
Scornful Touch
Occurs every 245 seconds
Targets a charmable add and enrages it

Scorn-touched Satyrs and Scornful Dryads
The general calls on additional support. Some of them can be controlled while others cannot.

Strategy: Short stage, so control damage. Continue to avoid the piercing shot, move the shatter shot away from the raid, and handle the adds that spawn.

Stage 3 (55% - 0%)

Overview
General Dipuc is no longer taking it easy, he is now throwing everything at the players, including curses and additional adds.

Mechanics

Dipuc
Piercing Shot:
Continues
Shatter Shot:
Continues
Scornful Touch
Continues
Curse of the Broken Heart
Occurs every 7% health
Picks 3 random players
After a short delay players will create an area around them
Anyone caught in the area will suffer dmg and have their attack speed and casting slowed
Creates Unrequited Love zones
If two zones overlap they will detonate, dealing significant dmg to the raid

Scorn-touched Satyrs and Scornful Dryads
Continue to aid the general

Lifelike Masterpiece
Remaining statues around the room become infused with scorn and come to life, attacking the general's enemies


Strategy: Control tougher lifelike statues, do not stack the curse auras and continue to execute the previous stage's mechanics. Keep in mind, space is limited.

Achievements

Complete additional challenges for special recognition:
Shattered Art: Destroy None of the Statues
Devastating Love: Detonate Three Unrequited Love zones
Love Lost: Do not detonate any Unrequited Love zones

Key Mechanics Summary

Mechanic Effect
Piercing Shot Cone AoE
Shatter Shot PBAoE, causes Shattered Fragments
Curse of the Broken Heart Single target DoT, creates an Unrequited Love zone
Unrequited Love Players that move into the zone will take dmg and have their casting / melee speeds slowed

EMOTE: xxxxxxxxxxx (action.)

EMOTE: xxxxxxxxxxx (action.)

EMOTE: xxxxxxxxxxx (action.)

EMOTE: xxxxxxxxxxx (action.)

EMOTE: xxxxxxxxxxx (action.)

MORUUK AND SORSHKAH (Tier 2)

From Quisl'ing The Trustworthy in Avarice, Plane of Greed, key word 'xxxxx.'

Moruuk and Sorshkah were running the show until their luck turned sour. Now Sorshka is sick and Moruuk is desperately trying to get the mines back under control.

(Shout-out to the CRC for the foundational design for this encounter. I had to cut and modify things to make it work, but the overall design was theirs. - Dev Raelith)

Encounter Overview
Moruuk and Sorshkah is a three stage encounter fought in the confined space of the quarry in the Plane of Greed. Sorshkah, Moruuk's pet manticore, is a little under the weather, but don't let that fool you, she is still a savage beast that will take her pound of flesh through AoE attacks. Moruuk is an accomplished beast master that may have been living the high life, but he didn't get to where he was without breaking a few skulls.
Savage Beast: Sorshkah is well trained, but still a savage manticore to her core and her attacks reflect that nature
Beastmaster: Before Moruuk became the boss he was an accomplished tracker, trapper, and trainer. He can command Sorshkah and works well with her
The Boss: Moruuk is more than just an ogre with a manticore, he is the boss and the boss has goons
Greed: The Plane of Greed plays a role in everything; expect coins, extortion, and bankers taking their cut

This is a 54-player raid for groups with gear from the latest expansion.

Stage 1 (100% - 81%)

Overview
Moruuk is currently dealing with problems somewhere else in the quarry, so only Sorshkah is active for this portion of the encounter and she is feeling very sick. Despite that, she has been trained to defend the quarry from any trespassers and she intends to follow through with her training using her claws, barbs, and a little snot.

Mechanics

Sorshkah
Sick:
Starts with 60 counters
Cannot be dispelled during this phase
Feral Toxin
Occurs every 120 seconds
Poison DoT with 120 counters
Targets 5 players
Barb Shot:
Occurs every 80 seconds
Frontal Cone
DoT and Mana Burn on players hit
Will destroy traps (Stage 2)
Rake:
Occurs every 90 seconds
Back-to-back side cones (left/right)
DoT, Knockback, and Silence on players hit
Sneeze:
Occurs every 180 seconds
While still feeling sick Sorshkah will occasionally sneeze, creating a glob of volatile snot
Snot will linger in the area and players getting too close will not feel so good
DoT, Reduced Movement Speed, Reduced spell casting and melee speeds

Strategy: Sorshkah is the only enemy active during this phase, so utilize the encounter area to avoid the snot and AoEs. Quickly cleanse the Feral Toxin to smooth damage during this stage.

Stage 2 (100% / 80% - 35%)

Overview
The commotion in the quarry has earned the attention of Moruuk. Both Moruuk and Sorshkah are active during this stage. Morruk brings with him goons, traps, and some good ol' fashion bareknuckle beatdowns. Oh, that problem Moruuk was dealing with? Yeah, that's found its way into the fight as well.

Mechanics

Sorshkah
Sick:
60 counters
Can now be dispelled
Feral Toxin
Continues
Barb Shot:
Continues
Rake:
Continues
Sneeze:
Continues while still sick
Damage Mitigation (Applies to both Moruuk and Sorshkah)
Reduces damage taken from 10% - 50% based on 'stacks'
Hitting the manticore with the correct order of fulmination spells will remove stacks of mitigation
Fulmination is broken down into Melee, Caster, Hybrid
Melee - Berserker, Monk, Rogue
Caster - Enchanter, Mage, Necro, Wizard
Hybrid - Bard, Beastlord, Ranger, Paladin, Shadowknight

Moruuk
Trap Toss
Occurs every 9% health
Becomes active after a slight delay
Lockjaw Trap
If triggered deal direct dmg and roots
Sick'Em
Occurs every 120 seconds
Moruuk summons 6 adds with a short lifespan
Random combination
lvl 128 - Can be charmed by bards and enchanters
lvl 129 - Can be charmed by enchanters
Orders Sorshkah to slam one of Moruuk's highest threat targets
Target is one of Moruuk's top 6 highest threat players
That target will become Sorshkah's highest threat target
Shorshkah will continue to slam that target until they are no longer the highest threat
Protection Racket
Occurs every 7% health
Summons and elite add (see below)
Slow Your Roll
Occurs every 90 seconds
Short range cone attack
Players hit will take dmg and have their attack speed / casting speed reduced
Stronger Together
Moruuk and Sorshkah work very well together
If they are too close they will buff each other
Increased melee attack speed
Balanced As All Things Should Be
When either Moruuk or Sorshkah reaches 75% life both will need to be kept within 5% of each other
If they are not then the boss with the lowest health percent will heal to the highest health %
Intimidating Goon (Protection Racket)
Taking Your Stuff
Drains mana and endurance
Escalating cast - the longer the goon stays alive the quicker it will take your stuff
1min -> 45 seconds -> 30 seconds -> etc..
The Problem - Greed Gateways
Three gateways (portals) spawn around the quarry each will begin spawning elemental goons in escalating numbers until they are destroyed
Blaze Gateway
Spawns blazing goons that take extra dmg from fire, corruption, slashing
Frozen Gateway
Spawns frozen goons that take extra dmg from cold, magic, blunt / hand to hand
Sickly Gateway
Spawns sickly goons that take extra dmg from disease, poison, piercing
Greed Coins
Goons that spawn from the portals will drop greed coins. These coins can be kept in your inventory or handed over for 'safe keeping'

Gold-laced Traps
Scattered around the quarry these traps can be disarmed for coins of greed

'Helpful' Banker
More than happy to store your coins, for a price. Who said the denizens of greed only look after themselves? Feel free to withdraw the coins when you need to, they've already made their gold off the investments with your coins.

Strategy: Phew, that's a lot! Allow portals to spawn some adds, but don't let them become overwhelming. Avoid AoEs, keep Moruuk and Sorshkah split and deal with intimidating goons quickly. Pay attention to the mitigation and execute. Piece of cake!

Stage 3 (34% - 0%)

Overview
Luck isn't on Moruuk's side, so he changes tactics, ordering Sorshkah to split off in an attempt to use the Plane of Greed and his control of the area to his advantage.

Mechanics

Sorshkah
Sick:
Sick continues as long as counters exist
Feral Toxin
Continues
Barb Shot:
Continues
Rake:
Continues
Sneeze:
Continues while still sick
Aura of Greed
Greatly reduces casting range
If a player does NOT have a Greed Coin in their inventory:
Decreases skill and spell damage by 50%
Decreases healing by 50%
Increases damage taken by 50%

Moruuk
Trap Toss
Continues
Sick'Em
Continues
Protection Racket
Continues
Slow Your Roll
Continues
Balanced As All Things Should Be
Continues
Aura of Poverty
Greatly reduces casting range
If a player HAS a Greed Coin in their inventory:
Decreases skill and spell damage by 50%
Decreases healing by 50%
Increases damage taken by 50%
Run Your Pockets
Occurs at 25% and 15% health
Removes all coins from players' inventories
Reduces the total count
Randomly distributes coins back out

Intimidating Goon (Protection Racket)
Taking Your Stuff
Drains mana and endurance
Escalating cast - the longer the goon stays alive the quicker it will take your stuff
1min -> 45 seconds -> 30 seconds -> etc..
'Helpful' Banker
The banker is here to help, store and withdraw coins as needed.

No Man's Land
Don't linger too long outside of the Greed or Poverty aura, bad things may happen.


Strategy: The bosses will be physically split. Distribute coins to players so they can switch sides as needed to help keep the boss' health totals close.

Achievements

Complete additional challenges for special recognition:
Expedient: Complete each mini game in under 20 seconds
The Portal Greed: Destroy none of the greed portals
Love Lost: Use charm bane to kill all the wolf adds

Key Mechanics Summary

Mechanic Effect
Barb Shot Cone AoE DoT with mana drain
Rake Side cone AoE that knockback and silence
Sick and Sneeze While sick Sorshkah will sneeze and create and are that applies a DoT, reducing casting / melee speed, and reducing movement
Damage Mitigation Reduces the damage inflicted to Moruuk and Sorshkah
Sick-Em Summons adds and orders Sorshkah to focus a target dealing significant damage
Slow Your Roll Short range cone AoE that deals dmg and reduces casting / melee speed
Stronger Together Increases the attack speed of Moruuk and Sorshkah when the are too close to one another
Balanced As All Things Should Be If Moruuk or Sorshkah's health percent is more than 5% below the other they will heal to the other's health percent
Aura of Greed / Poverty If in the wrong aura deceases skill damage, spell damage, healing, and increases damage received


EMOTE: 

EMOTE: 

EMOTE: 

EMOTE: 

EMOTE: 

EMOTE: 

EMOTE: 

EMOTE: 

EMOTE: 

THE DOORMAN (Tier 2)

From Quisl'ing The Trustworthy in Avarice, Plane of Greed, key word 'xxxxx.'

Taurlton, the Doorman, was ordered to not let anyone into the palace unless they are on the list and you are not on the list.

Encounter Overview
The Doorman is a four stage encounter that takes place in one of the upper levels of the city. Taurlton may be recently promoted, but he has a knack for crushing things smaller than him and he is a very large minotaur. The Doorman plans to use his size, immense strength, and horns to smash, crush, and bleed you out.
Minotaur: Taurlton is like a bull, ready to dig his horns into anything or anyone that dares to stand up to him
Bouncer: Due to his immense size, Taurlton found a lot of work as a bouncer, tossing upstarts to the back of the line and black listing patrons that got out of hand
Has a List: To be clear, the list is empty, but you are for sure not on it
Doesn't Work Alone: Just because he is the biggest and potentially the strongest there is doesn't mean he works alone

This is a 54-player raid for groups with gear from the latest expansion.

Stage 1 (100% - 85%)

Overview
Taurlton takes his job very seriously and when he says you aren't on the list, he means it. He will utilize gore attacks, bleeds, and literal chunks of the city to drive you off.

Mechanics

Taurlton
Not on the List
Occurs every 45 seconds
Gores the main tank
Deals high damage
Causing a stack of Sucking Wound
Sucking Wound
DoT effect that stacks up to 4 times
Each stack refreshes the timer and deals increasingly more damage
At 4 stacks the target Bleeds Out
Tossing the Trash
Occurs every 11% health
AoE Cone that must be soaked by at least 10 players
Player hit will take damage and receive a stack of Sucking Wound
If not enough player soak then the entire raid receives a stack of Sucking Wound

Strategy: Soak the AoEs, watch your stacks, and keep moving forward.

Stage 2 (84% - 65%)

Overview
You haven't gotten the message yet, but that's okay, Taurlton is calling in some assistance to help squash the upstarts and he will toss chunks of rubble into the air to rain down on your heads for good measure.

Mechanics

Taurlton
Not on the List
Continues
Sucking Wound
Continues
Tossing the Trash
Continues
Falling Debris
Occurs every 90 seconds
5 rubble piles will fall from the sky
Players that step into the rubble piles will take damage and destroy the rubble pile
Hulking Bruiser
Spawns ever 13% health
Jump into the arena, crashing down on targeted player's heads
Deal damage to anyone around the targeted player
If two bruisers get too close to one another they become emboldened
Increasing attack speed and providing a damage shield
Denizens
Your fighting has drawn the attention of opportunistic denizens who are looking for their chance to get ahead
Occurs every 110 seconds
Random assortment of adds spawn from the edge of the arena
Made Centaur - mezzable
Enraged Henchman - charmable
Desperate Opportunist - rootable

Strategy: Watch your feet and don't step in the rubble, you may need them later. Control small adds and tackle the bigger ones.

Stage 3 (64% - 40%)

Overview
Okay, that's it. You're blacklisted!

Mechanics

Taurlton
Not on the List
Continues
Sucking Wound
Continues
Tossing the Trash
Continues, but now occurs twice in a row
Falling Debris
Continues
Black Listed
Occurs every 80 seconds
Targets 5 players
Deals DoT
Moving into a rubble pile removes the curse and changes the rubble pile into a stationary quicksand golem (see below)
If the debuff is not removed, the weight of being on the black list forever crushes your spirit (you die) and the raid takes a large amount of damage

Quicksand Golem
Stationary and surprisingly pretty chill as long as you keep your distance
Moving into their area will root the player in place and apply a DoT

Hulking Bruiser
Continue to spawn
Denizens
Continue to spawn

Strategy: Utilize rubble to remove the black listed debuff and keep on your toes.

Stage 4 (39% - 0%)

Overview
Taurlton has had enough. You haven't gotten the message yet, so it is time to resort to tactics he knows works and send you to the back of the line.

Mechanics

Taurlton
Not on the List
Continues
Sucking Wound
Continues
Tossing the Trash
Continues
Falling Debris
Continues
Black Listed
Continues
Back of the Line
Occurs every 85 seconds
Massive PBAoE
Players will be thrown across the room and take significant damage

Quicksand Golem
Stationary and surprisingly pretty chill as long as you keep your distance
Moving into their area will root the player in place and apply a DoT
Players standing in the quicksand aura will take no damage and will not be thrown

Hulking Bruiser
Continue to spawn
Denizens
Continue to spawn

Strategy: Keep a close eye on those bleed stacks, stand in the quicksand to stop from being thrown, and burn.

Achievements

Complete additional challenges for special recognition:
Threat Escalation: Kill 6 enraged bruisers
Threat Mitigation: Never let a bruiser get enraged
Reserve List: Never destroy a debris pile without being on the black list

Key Mechanics Summary

Mechanic Effect
Sucking Wound Stacking bleed DoT that will instant kill when at 4 stacks
Tossing the Trash Large cone AoE that must be soaked by at least 10 players, applies a stack of Sucking Wound
Falling Debris Creates piles of rubble that are destroyed when moved into
Black Listed Heavy DoT curse that will instant kill and detonate if left to expire naturally
Back of the Line Massive PBAoE that throws players and deals significant damage 

EMOTE: xxxxxxxxxxx (action.)

EMOTE: xxxxxxxxxxx (action.)

EMOTE: xxxxxxxxxxx (action.)

EMOTE: xxxxxxxxxxx (action.)

EMOTE: xxxxxxxxxxx (action.)

FRACTURED VAZAELLE (Tier 2)

From Lady of Whispers in Bedlam, Plane of Madness, key word 'xxxxx.'

Vazaelle Kaleine fractured herself into five separate aspects of her madness, destabilizing the plane. To bring help get things under control (at least as much as you can in the Plane of Madness) you need to convince the others to reform.

Encounter Overview
During each stage of this five stage encounter you will face off against a different fractured version of Vazaelle, each with their own skills and abilities.
The Aberrant: Curses and roaming clouds of madness, the Aberrant delights in your insanity
The Voidless: Psychic shrieks and blasts will ravage your mind while confronting the Voidless
The Devout: Prepare to be judged
The Inevitable: Death is inevitable and so is she
The Mad: Fragments consumed and reformed

This is a 54-player raid for groups with gear from the latest expansion.

Stage 1 Vazaelle Kaleine The Aberrant (100% - 25%)

Overview
Your first encounter is with Vazelle Kaleine The Aberrant, she will utilize corruption and maddening clouds to drive you insane, driving you to attack your friends.

Mechanics

The Aberrant
Maddening Influence
Occurs every 16% health
3 players are targeted
Corruption DoT with 24 counters
Increases Attack Power
If dispelled it will jump to another player
If left to expire naturally it will charm the target
Creeping Madness
Occurs every 45 seconds
2 Clouds are created
Players that step into the cloud will gain a 'stack' of Creeping Madness
Light DoT
Target is charmed at 5 stacks

Strategy: Remove the maddening influence, but don't let the buff go to waste. Avoid the creeping madness, it smells funny.

Stage 2 Vazaelle Kaleine The Voidless (100% - 25%)

Overview
Your second encounter is with Vazelle Kaleine The Voidless, she will utilize psychic attacks to weaken and break your mind.

Mechanics

The Voidless
Fractured Psyche
Occurs every 14% health
Random number of players are selected
Fractured psyches of the targeted players will spawn and begin to slowly chase their target
If the psyche is destroyed it will explode, dealing a large amount of damage to the raid
Silencing Mist
Occurs every 30 seconds
3 players are targeted
After a short delay they will create an area of mist
Players that move into the area will be silenced
Fractured Psyche that move into the mist will be rooted and when killed will no longer damage the raid
Psychic Shriek
Occurs every 40 seconds
Cone AoE that will target a player
After a short delay the cone will stop tracking the player
Players hit by the cone will suffer DoT and be silenced
Psychic Blast
Occurs every 35 seconds
Targets the highest threat player
Inflicts damage and reduces HP total to 25%

Strategy: Spread to avoid the AoEs, drag the fractured psyche into the silencing mist to avoid their damage, and think about swapping tanks after they've been blasted.

Stage 3 Vazaelle Kaleine The Devout (100% - 25%)

Overview
The third encounter is with Vazelle Kaleine The Devout and she is extremely angry. You have invaded her realm and she intends to punish you.

Mechanics

The Devout
Dread Judgement
Occurs every 45 seconds
Massive PBAoE that inflicts raid wide damage and knocks everyone back
Shreds the highest threat player's armor, reducing their AC
Madness Amalgamation
Occurs every 60 seconds
2 amalgamations spawn and each focus a player
Amalgamations cannot be damage
After 30 seconds or if they get too close to their target they will detonate, dealing a large amount of damage to the raid
Moving an amalgamation near a statue will despawn the statue and the amalgamation

Statues
Several armored statues are positioned around room. Utilize them to deal with the amalgamations

Strategy: Swap tanks on the knockback and drag amalgamations into statues, but keep in mind, there are only so many statues.

Stage 4 Vazaelle Kaleine The Inevitable (100% - 25%)

Overview
Your first encounter is with Vazelle Kaleine The Aberrant, she will utilize corruption and maddening clouds to drive you insane, driving you to attack your friends.

Mechanics

The Aberrant
Tainted Pools
Occurs every 30 seconds
4 pools are created
Pools will grow over time
Players that move into a pool will be afflicted with Tainted Affliction
DoT
Arcing Slash
Occurs every 45 seconds
Targets the highest threat player
Short range, high damage cone AoE
Applies a bleed to anyone hit
If a bleeding target is hit by a second arcing slash they will be exsanguinated and it is tough to live without blood
Wither
Occurs every 40 seconds
3 players are targeted
After a short delay they will errupt and apply Wither debuff to everyone around them
DoT
If a player with the Wither DoT moves into a Tainted Pool they will explode, dealing damage to the entire raid and despawning

Strategy: Avoid standing in the Tainted Pools, try not to spread wither, and remember you can clean up the area by walking wither into a pool. Oh, and don't get exsanguinated.

Stage 5 Vazaelle Kaleine The Mad (100% - 0%)

Overview
The final encounter sees you facing off against Vazaelle Kaleine, but only after she has consumed the other fragments of herself. Expect to see returning abilities from each of the other phases as you rush to defeat the mad goddess.

Mechanics

The Aberrant
Maddening Influence
Occurs every 16% health
3 players are targeted
Corruption DoT with 24 counters
Increases Attack Power
If dispelled it will jump to another player
If left to expire naturally it will charm the target
Silencing Mist
Occurs every 30 seconds
3 players are targeted
After a short delay they will create an area of mist
Players that move into the area will be silenced
Tainted Pools
Occurs every 30 seconds
4 pools are created
Pools will grow over time
Players that move into a pool will be afflicted with Tainted Affliction
DoT
Arcing Slash
Occurs every 45 seconds
Targets the highest threat player
Short range, high damage cone AoE
Applies a bleed to anyone hit
If a bleeding target is hit by a second arcing slash they will be exsanguinated and it is tough to live without blood
Wither
Occurs every 40 seconds
3 players are targeted
After a short delay they will errupt and apply Wither debuff to everyone around them
DoT
If a player with the Wither DoT moves into a Tainted Pool they will explode, dealing damage to the entire raid and despawning
Dread Judgement
Occurs every 45 seconds
Targeted Cone
Anyone not the target of the cone that is hit will take significant damage and be thrown

Strategy: The play space is much smaller which makes dodging AoEs, clouds, and other mechanics all that more difficult. Take the strategies from the first 4 stages and burn the boss.

Achievements

Complete additional challenges for special recognition:
In Control: No players were mind controlled
Give In To Madness: At least 10 players were mind controlled
Growing Affliction: Do not destroy any tainted pools

Key Mechanics Summary

Mechanic Effect
Maddening Influence DoT that increases attack power, when dispelled it will jump to another player. If it isn't dispelled it will charm the target
Creeping Madness Stacking DoT that will charm targets when it reaches 5 stacks
Silencing Mist AoE mist that will silence players that move into it. When a fractured psyche is brought into the mist it will be rooted and will not explode when killed
Tainted Pools Pool that applies a heavy DoT to players that move into them. The pools grow over time
Arcing Slash Short range cone AoE that applies a heavy DoT. Players with the DoT that are hit again are killed

EMOTE: xxxxxxxxxxx (action.)

EMOTE: xxxxxxxxxxx (action.)

EMOTE: xxxxxxxxxxx (action.)

EMOTE: xxxxxxxxxxx (action.)

EMOTE: xxxxxxxxxxx (action.)

XEV TESTS FATE (Tier 3)

From Norna Sal in Serendyl, Plane of Luck, key word 'xxxxx.'

Xev Bristlebane, the god of luck, seeks to test the players, not by defeating a traditional threat, but by surviving unpredictable, ever-changing challenges, all in the name of entertainment.

Encounter Overview
Xev Bristlebane isn't planning on sitting out on all the fun and will be taking on the player directly with random mechanics based on the roll of a dice. Over the course of three stages expect there to be a sprinkle of adds, a few coins, a bookie, and a few memory games and you have the makings of a good time, at least for Xev.
Luck Plays a Factor: Xev's primary ability is random and can result in unexpected outcomes
Bookie: Pick up coins and turn them into the bookie to swing luck your way
Lucksworn: Xev isn't here alone. He is accompanied by the lucksworn, so stay on your toes

This is a 54-player raid for groups with gear from the latest expansion.

Stage 1 (100% - 80%)

Overview
Xev is eager to get started, but doesn't want the game to end too quickly. In an effort to keep the fun going for as long as he can he is start things off slowly. Roll some dice, invite a few friends to play, toss a handful of coins into the air. You know, keeping it chill.

Mechanics

Xev Bristlebane
Roll the Dice
Occurs every 30 seconds
One of the following random effects will happen
Roll the Dice: Rush Order
Wagerlings spawn early
Roll the Dice: Befuddle
Random number of players have their attack speed slowed and increased spell fizzle chance
Roll the Dice: Fear
Random number of players are feared and take increased damage
Roll the Dice: Resource Burn
Random number of players are inflicted with manaburn
Roll the Dice: Wallop
Highest threat target takes a big hit
Heads Up
Xev tosses a bunch of small coins into the air, some you need to catch and some you need to avoid
Occurs every 120 seconds
10 Catch Circles
A single player needs to stand in the circle to catch the coin
Failure to have any player stand in the circle will result in the raid taking damage
10 Avoid Circles
Players that stand in the circle will take significant damage

Wagerlings
Spawn every 12% health starting at 90%
5 wagerlings will spawn at a time
Slowly move toward Xev
If they reach Xev they will detonate, dealing raid wide damage and will not drop a coin purse
If they are killed before reaching Xev they will drop a coin purse on the ground

Lucksworn Bookie
Xev thought it would be interesting to even up the odds, just a little, and is providing you an ally to shift things into your favor
Turn in and spend coins to receive one of the following buffs:
Short duration fear immunity for the whole raid
Mana regen buff for the player that turned the coin in
Remove a random number of active Heads Up soaks

Strategy: Deal with the randomness of Roll the Dice, prevent wagerlings from reaching Xev, and catch / avoid the heads up coins. All while requesting help from the bookie.

Stage 2 (79% - 40%)

Overview
You've proven that your a tough lot and a a great deal of fun to play with. Xev wants to turn up the heat by raising the stakes, calling for more of his lucksworn friends to join in the game.

Mechanics

Xev Bristlebane
Roll the Dice
Continues
Heads Up
Continues
Lucky or Not
Occurs every 100 seconds
Xev selects one lucky, random player
Teleports to the player and roots them in place
After a short delay one of two spells are cast
Jackpot
Player hit will have their attack speed and casting speeds increased
Wrong Place Wrong Time
Players hit will take damage and be knocked back
Xev will repeat this two more times (total of 3)
Wagerlings
Continue to spawn
In addition Superior Wagerlings will spawn
Similar to standard wagerlings, but these are immune to ranged spells and CC
Lucksworn
Spawn every 20% health
Four unique Lucksworn will spawn each time
Lucksworn must be killed in a specific order or they will respawn and fully heal
Lucksworn all have their own abilities (see below)
Lucksworn Greed
Casts Forced Transfer on Xev's highest threat player
Absorbs healing received
Transfers that healing to Xev (% based)
Lucksworn Doubt
Focuses a random player and begins to move toward them
If Doubt comes into contact with the focused player they will be killed and the raid will take damage
Lucksworn Hope
Casts Lucksworn Empower on Xev
Decreases the cooldown on roll the dice
Lucky or Not's negative effect is empowered
Lucksworn Control
Focuses a lucky random player and begins to move toward them
If Control comes into contact with the focused player they will be rooted in place
Control will then find a new target and duplicate (yay! more friends)

Strategy: Pay attention to which Lucky or Not buff is being applied and either spread out to avoid damage or stack up to get the buffs. Really pay attention to the Lucksworn kill order to eliminate them quickly before things get really out of hand.

Stage 3 (39% - 5%)

Overview
Xev is ready to bring this game to a close, but he isn't one to outright cheat. Instead he will just add more rules to the game. That way he can beat you fair and square.

Mechanics

Xev Bristlebane
Roll the Dice
Continues
An additional roll option presents itself Roll the Dice: Luck Zone
If this is rolled a random Luck Zone will be spawned (see below)
Heads Up
Continues
Lucky or Not
Continues
Fate Collapse
Occurs every 10% health starting at 30%
Xev teleports to the center of the arena and locks his health
Four color coded quadrants spawn from the center of the arena
Xev will call out a quadrant
Players will have a short amount of time to quickly get to that quadrant
Players that fail to get into the correct quadrant are hit with Crushing Laxity taking damage and reducing their movement
This will make it more difficult for them to get to the next quadrant
Two more quadrants will called out (total of 3)
Once all quadrants are called Xev will return to the game, taking damage once more
Luck Zones
Xev is nothing if not fair, he will let luck decide this fight
Occurs every 100 seconds
Xev will spawn a random Luck Zone
Good Luck Zone
Lucky Boon - Players that enter this zone will have their max HP increased
Bad Luck Zone
Unlucky Hindrance - Players that enter this zone will take damage

Wagerlings
Continue to spawn

Lucksworn
Continue to spawn

Lucksworn Bookie
Two new options are now available
Remove a Bad Luck Zone
Add a Good Luck Zone

Strategy: Things escalate quickly here and there is a lot to keep track of. Keep a close eye on the Lucksworn, letting them roam around unchecked can spell disaster. Be sure to pay attention to the fate collapse callouts, failure on one can mean failure on them all. Utilize the bookie's buffs to help cross the finish line and show Xev that you came to win.

Achievements

Complete additional challenges for special recognition:
All In: Do not let any Wagerlings self detonate
Eye on the Prize: Catch ALL of the heads up tokens
A Simple Game of Memory: Kill the Lucksworn in the correct order everytime

Key Mechanics Summary

Mechanic Effect
Roll the Dice One of 5 / 6 random effects
Heads Up Several areas are created - some must be soaked, some must be avoided
Lucky or Not Xev roots a player in place and casts either a PBAoE buff or a damaging knockback
Fate Collapse Get to the correct quadrant or take damage and be slowed
Lucksworn Doubt If it comes into contact with its focus target it will kill that player
Lucksworn Control If it comes into contact with its focus target it will root them and then duplicate

EMOTE: xxxxxxxxxxx (action.)

EMOTE: xxxxxxxxxxx (action.)

EMOTE: xxxxxxxxxxx (action.)

EMOTE: xxxxxxxxxxx (action.)

EMOTE: xxxxxxxxxxx (action.)

RECORD KEEPER (aka Chronicles of War) (Tier 3)

From Tovigor Nolg in Averness, Plane of Guile, key word 'xxxxx.'

The Custodian of Knowledge, the Scribe of Guile, the Record Keeper, all names given to the being that knows everything about every battle ever fought and he is standing between you and the Lord of Guile.

Encounter Overview
The Record Keeper has spent his long existence watching others fight and that isn't about to change. He will not be engaging you directly, instead he will summon echoes of past battles that fight in his stead. The fight will take place over three stages, each stage adding another echo from the past to the mix. Drawing the echoes from the past does require effort and defeating them enacts a toll on the Record Keeper.
Echoes of the Past: The Record Keeper will not fight you directly, instead you will face off against echoes from past battles. These echoes are fragments or snapshots of those encounters
Wombo Combo: Each echo has their own set of abilities and some combinations may be more difficult than others
Library: The 'arena' is as much as part of this encounter as the echoes themselves. Limited space will make you think fast on your feet when adds, echoes, and abilities start occurring

This is a 54-player raid for groups with gear from the latest expansion.Stage 1 (One Echo)

Overview
The Record Keeper has watched your battles, but wants to witness your strength first hand. To test the waters he will be summoning a single echo.

Mechanics

Record Keeper
Summon Echo of Past Battles
One of Six echoes will be summoned
The echo is random and will change every attempt
Once the echo is defeated the encounter will progress to stage 2

Books
Spawn every 60 seconds*
Only spawn if the echo does not have adds associated with it
3 books spawn at a time
Paper Cyclones
Spawn every 145 seconds*
Only spawn if the echo does not have adds associated with it
4 cyclones spawn at a time
Relatively low health adds that explode, dealing damage to the raid, when killed
Cyclones can be mezzed
If mezzed they will not explode

Strategy: Fight the echo, eliminate books, and be careful not to accidently destroy the cyclones until you are ready.

Stage 2 (Two Echoes)

Overview
Things are getting interesting, the Record Keeper wants to make you sweat, so he is summoning two echoes.

Mechanics

Record Keeper
Summon Echoes of Past Battles
Two of Six echoes will be summoned
The echoes are random and will change every attempt
The same echo from stage 1 will not be summoned
Once the echoes are defeated the encounter will progress to stage 3

Books
Continue to spawn
Paper Cyclones
Continue to spawn

Strategy: Fight two echoes at the same time, eliminate books, and be careful not to accidently destroy the cyclones until you are ready.

Stage 3 (70% - 0%)

Overview
The Record Keeper may have underestimated you, but he has a plan. What if you had to deal with three echoes at all times? That will surely defeat you.

Mechanics

Record Keeper
Summon Echoes of Past Battles
Three of Six echoes will be summoned
The echoes are random and will change every attempt
When an echo is defeated it will cause feedback on the Record Keeper, dealing 10% of his health
There will be three echoes up at all times, when one is defeated another will spawn
No two of the same echo can be up at the same time

Books
Continue to spawn
Paper Cyclones
Continue to spawn

Strategy: Three echoes will always be up during this stage, eliminate the more difficult ones quickly.

The Echoes

Overview
Each echo is a snapshot of its original encounter.

Miragul Reformed
As a master of the arcane paths, Miragul will cast spells from various schools of magic while active.

Power of the Synarcana
Occurs every 15 seconds
PBAoE that targets a random player
Deals dmg player and all players around them
Lethal Lifetap
Occurs every 30 seconds
Deals dmg to a random player
Spreading Evil
Occurs every 35 seconds
Deals dmg to a random player
Corruption slows movement speed and applies a DoT with 20 corruption charges
Splart
Occurs every 25 seconds
Applies a DoT to a random player
Self-Immolation
Occurs every 65 seconds
PBAoE that targets a random player
Applies a DoT to that player and all players around them

Hulking Bodyguard
Summoned every 130 seconds

Hatchet
Hatchet hasn't gotten a lot of cardio recently, so he reserves his movement for when he really wants to get someone.

Minotaur Gore
Occurs every 120 seconds
Singles out a player and chases them for 30 seconds
If he makes contact they will be hit by a PBAoE
Target player and all nearby players take dmg and are knocked down
Decapitating Chop
Occurs every 35 seconds
8 players will be selected to perform a random action
If they fail to perform the action, Hatchet will give them the... hatchet

Meldrath the Malignant
Malaise
Occurs every 70 seconds
Targets a random player
Applies a DoT and reduces spell casting speed, combat skill, and slows movement
Spite
Occurs every 180 seconds
Corrupts a random player with 16 corruption counters
If it fails to be removed players in a ring around the target player take dmg
Harvester's Gravestone
Spawns when Meldrath spawns
Spawns 3 Skeletons every 90 seconds
Spawns 2 Shadows every 180 seconds
Spawns Stinking Miasma every 270 seconds
Players that enter the stinking miasma will take dmg and lose a little mana and endurance
Tick-Tock Bomb
Spawns every 70 seconds
After a short delay it will begin to wander around the area
If killed during this stage it will explode, dealing a small amount of dmg to the raid
After 15 seconds of wandering it will target a random player and slowly move toward them
If killed during this stage it will explode, dealing dmg to the raid
After 35 seconds it will detonate, dealing a large amount of dmg to the raid
Steamworks Obliterator
Spawns every 90 seconds
Two obliterators will spawn at a time
Repair Crew
Spawns every 50 seconds
Two repair crewman will be spawned
Move toward an active steamworks
If they spend 15 seconds near a steamwork it will be healed
Builders
Spawns every 60 seconds
Two builders will be spawned
After 60 seconds they will build one of two Steamwork Creations
Steamwork Obliterator
Steamwork Terminator

Tunat'Muram Cuu Vauax
Say that three times fast.
Berserk
Occurs every 25 seconds (after the previous Berserk fades)
Lasts for 25 seconds
While berserk melee attacks hit harder
Single Out
Occurs every 15 seconds
Casts one of the following spells at a random player
Spirit Cleaver
Applies a DoT with 297 poison counters
Reduces Attack Power, mana, endurance, and all stats
Soul Consumption
Deals dmg and reduces mana
Spear of Discord
Deals dmg and stuns
Unchecked Wrath
Occurs every 30 seconds
Casts one of the following AoE spells at a random player
Wave of Rage
Deals dmg to players hit and applies a DoT with 396 poison counters
Reduces INT and WIS
Reduces mana by 50%
Ikaav Venom
Applies a DoT to all players hit with 36 poison counters
Reduces melee attack speed
Discord's Rebuke
Deals a large amount of dmg to players hit

Principal Indagatrix Lucia
The first time she is summoned she will be summoned with her three students. While one of her students is still alive she cannot be taken below 20% health.
Spells
Occurs every 60 seconds
She will cast one of the following spells (selected at random)
Vis Percussio
Curses a player, causing their skills to have a chance to proc inflicting dmg and stun themselves
Vita Anuimis
Curses a player, causing their skills to have a chance at draining their melee resources
Vita Tardius
PBAoE that targets a random player
Applies a DoT and reduces attack speed for targeted player and all players in a small radius
Claustro Vitoris
Targets a random player, deals Dmg and stuns
Claustro Facultis
Targets a random player, deals Dmg and reduces mana
Repenta Vitoris
Applies a DoT to a random player
Ignas Maxio
PBAoE that targets a random player
Applies a DoT and reduces movement speed to all players around them
Humas Maxio
PBAoE that targets a random player
Deals Dmg, knocks them back, and stuns all players around them
Gravitas Maxio
Targets a random player, deals dmg and continuously pushes them away
Resonating Beam
Occurs every 45 seconds while one of her students are alive
Targets one of her students and fires the beam
Players hit by the beam will take significant damage, has a beneficial effect removed, has their mana reduced, and has their endurance reduced
Resonating Blase
Occurs every 45 seconds while none of her students are alive
Players hit will suffer the same effects as the beam, but will also be stunned
Shifting Focus
Occurs every 60 seconds
Drops hate
Targets a random player and teleports to them, setting them as the highest hate player

Indagatrix Adria
Vis Percussia or Vita Anuimis
Occurs every 45 seconds
Casts either Vis Percussia or Vita Anuimis
Vita Tardius
Occurs every 15 seconds

Indagator Tatio
Claustro Vitoris
Occurs every 15 seconds
Claustro Facultis
Occurs every 25 seconds
Repenta Vitoris
Occurs every 30 seconds

Indagator Ursus
Ignas Maxio
Occurs every 20 seconds
Humas Maxio
Occurs every 25 seconds
Gravitas Maxio
Occurs every 40 seconds

The First Creation
Cures of the First Creation
Occurs every 100 to 120 seconds
Applies a curse to a random player with 6 counters
If the curse is not removed the player is slain
Repulsion of the First Creation
Occurs every 100 to 120 seconds
Knocks everyone away from the First Creation
Shortly after casts Retribution of the First Creation
Retribution of the First Creation
Occurs ~10 seconds after Repulsion of the First Creation
Massive PBAoE that does more dmg the further you are away from the First Creation
Lava Elemental Protection
Stacking damage shield
Shield is more powerful for each Lava Golem that is currently active

Lava Golems
A Lava Golem will spawn when the First Creation does
Spawns an additional Lava Golem every 100 seconds

Achievements

Complete additional challenges for special recognition:
Shattered Echoes: Kill none of the echoes more than three times
Deja Vu: Kill the same echo more than three times
Handled It: Let none of the TikToks self detonate or detonate any paper cyclones

Key Mechanics Summary

Mechanic Effect
Stage 1 - Solo Echo One random echo from a pool of six will spawn
Stage 2 - Double Echo Two random echoes from a pool of the remaining five will spawn
Stage 3 - The Triple Threat Three random echoes will be active at all times

EMOTE: xxxxxxxxxxx (action.)

EMOTE: xxxxxxxxxxx (action.)

EMOTE: xxxxxxxxxxx (action.)

EMOTE: xxxxxxxxxxx (action.)

EMOTE: xxxxxxxxxxx (action.)

ERIAK ZEK (aka Affirmation of Zek) (Tier 3)

From Eriak Zek, Ruler of the Plane of Guile in Averness, Plane of Guile, key word 'xxxxx.'


Through cunning manipulation and the desperation of others, Eriak Zek broke free from the chains that bound him to the Plane of War. To prove himself a worthy son of Rallos Zek, he challenged and defeated both of his siblings in combat, claiming his place as the ruler of the Plane of Guile. Now he stands ready to test your mettle with his arsenal of enchanted weapons and the traps of his domain.

Encounter Overview

Through cunning manipulation and the desperation of others, Eriak Zek broke free from the chains that bound him to the Plane of War. To prove himself a worthy son of Rallos Zek, he challenged and defeated both of his siblings in combat, claiming his place as the ruler of the Plane of Guile. Now he stands ready to test your mettle with his arsenal of enchanted weapons and the traps of his domain.
Eriak Zek is a multi-phase encounter built around escalating complexity and pressure. The key themes are:

Weapon Mastery: Eriak wields five different weapons, each with unique mechanics and dangers
Control and Counterplay: Charm mechanics and puzzle-solving are critical to managing the encounter
Escalating Pressure: Each phase ramps up difficulty with new mechanics and increased add spawns
Strategic Decision-Making: Players must choose between addressing multiple simultaneous threats
This is a 54-player raid for groups with gear from the latest expansion.

Stage 1: The Posture (100% - 80%)
Overview

Eriak begins by demonstrating his dominance through a display of martial prowess rather than committing fully to combat. This opening phase is short and serves as an introduction to managing multiple threats.

Mechanics

The Split:

10 seconds after the fight starts, Eriak splits into 5 copies of himself
One copy behaves as a Tallon variant, while the other four act as Vallon variants
Only one of the five is the "real" Eriak—the others are illusions
The real Eriak is randomized each attempt, so players cannot predict which one is genuine

Vallon Behavior:

Each Vallon copy casts Tactical Whirlwind Slash, a PBAE attack that damages everyone not in the group
The spell intensity scales based on how many other Vallon copies are nearby
Tank immunities are limited and only protect a single hit, so overlapping damage requires positioning awareness

Tallon Behavior:

The Tallon variant teleports around the room, striking from different positions
It rapidly casts Barb of Tallon, a series of debilitating attacks with varying effects:
Targeted AoE attacks that damage and slow
Single-target stuns and knockbacks
Silences and amnesia effects
It combines these with Tallon's Power, which both dispels buffs and creates gravity flux effects

Strategy: Focus DPS on eliminating the copies while identifying the real Eriak. The split only lasts until his health reaches 80%.

Stage 2: Active Combat (80% - 40%)

Overview

Eriak stops posturing and commits to the fight. This phase introduces his weapon system, dangerous adds, and the first major control mechanics. The complexity increases significantly as multiple systems interact.

Core Boss Mechanics


Eriak casts Tactical Whirlwind Slash continuously, forcing the raid to spread effectively
He periodically Knocks Down the main tank, requiring tank coordination
He spawns Sword Storm zones at various locations as area denial that the raid must navigate around

Protection of Zek:

Eriak has a damage reduction buff that makes him harder to burst down
This buff is tied to the effectiveness of charmed adds—more on that below

The Weapon System

Eriak is a master blacksmith with five legendary weapons, each representing different combat strategies:

The Axe:

Attacks in wide sweeping arcs with Axe Sweep
Reduces the armor of the main tank via Blacksmith's Corrosion, encouraging tank rotations

The Knuckles:

Focuses on single-target devastation
Uses Aggressive Punch to stun and knockback targets
Improves Eriak's defenses when wielded with Eriak's Fortification

The Spear & Net:

Throws a net at a single target with Confining Bonds, rooting and DoTing them
The netted target becomes vulnerable to a followup Spear of Zek, a massive line AoE that deals extreme damage
Netted players must have the root removed immediately

The Daggers:

Improves Eriak's attack speed
Rapidly applies DoTs to multiple targets via Rapid Shanks
Marks a random target (with preference for healers) for Assassination of Zek—a deadly attack that kills instantly unless the target backs against a wall

The Hammer:

Uses Slam attacks that hit an AoE around the impact point
Damage scales inversely with the number of players in the slam area—the fewer players present, the higher the damage
A visual decal warns where the slam will land; players must stack in the decal to reduce damage

Weapon Transitions:

When Eriak switches weapons, the old weapon is thrown and becomes an independent add (though initially untargetable)
Each thrown weapon inherits abilities based on which weapon it is


Add Management

Harassers and Bruisers:

Adds spawn throughout this phase and become increasingly frequent
Harassers reduce outgoing damage of DPS classes
Bruisers lower the mitigation of tanks and hybrids
These adds are difficult to kill but can be charmed to fight alongside the raid

Charming Strategy (The Desire Switch):

Charmed adds become allies and attack Eriak instead
Charmed Harassers strip Eriak's defensive proc (Razor Armor), making him vulnerable
Charmed Bruisers strip his damage reduction buff (Protection of Zek), allowing the raid to burn him faster
Timing charm usage is critical to maximizing burn phases


The Water Sort Puzzle


A weapon rack sorting puzzle begins during this phase and continues through the rest of the encounter
The puzzle uses the same logic as a water sort puzzle: match weapon types on the same racks
Failing to progress on the puzzle has serious consequences in later phases
Adds spawn at specific locations tied to the puzzle—solving racks removes spawn points

Anti-Archetype Adds:

Counter-healer adds increase casting time for healers if left alive too long
Counter-caster adds increase casting time for casters if left alive too long
Counter-melee adds apply slows to melee if left alive too long
These adds create pressure to balance killing them with managing the puzzle

Strategy: Coordinate between players solving the puzzle and those managing adds. Prioritize charming adds at strategic moments to remove Eriak's buffs before burn windows.

Stage 3: Escalation (40% - 20%)

Overview

All previous mechanics continue, but now Eriak introduces zone-wide Doom. This phase is characterized by a difficult choice: accept the damage from Doom, or use the Greed switch and accept penalties.

Doom Mechanic

Eriak's Doom:

Eriak begins casting Doom of the Blacksmith, a zone-wide effect that deals massive damage to all players
This occurs multiple times per phase, creating constant pressure
Doom can be prevented by activating the Greed switch

The Greed Switch Penalty:

Using the Greed switch stops the Doom cast
However, this incurs Greedy Repercussions on all players:
All spells cost more mana
Melee attacks are slowed
Players must decide: take the Doom damage or accept the penalties?

Strategic Considerations:

Sometimes it's preferable to split the raid: some players take Doom while others use Greed
Groups with strong healing and large health pools can survive Doom
Groups with limited mana pools might prefer to use Greed
Timing switch usage against other mechanics is crucial

Increased Puzzle Pressure

The weapon rack puzzle now spawns 2 new adds per interval instead of 1
Area denial zones continue to spawn from Eriak's position
The raid must juggle Doom decisions, add management, and puzzle solving

Stage 4: The Burn Accelerates (20% - 5%)

Overview

The encounter intensifies dramatically. Reaction windows shrink as all pressure mechanics scale upward simultaneously.

Escalating Threats


Area denial zones increase in frequency and number
A second sword storm zone spawns on the opposite side of the arena
The weapon puzzle now spawns 4 new adds per interval
Add spawn timers decrease, forcing faster responses
Eriak's Tactical Whirlwind Slash becomes more damaging (changes spell variant)

Critical Phase

Puzzle solving must accelerate significantly
Add management becomes frantic
Doom continues to apply pressure
Tank mitigation becomes critical as damage intake spikes

Strategy: If the puzzle isn't solved by now, expect severe consequences at 5%. Prioritize finishing it during this phase.

Stage 5: The Final Burn (5% - 0%)

Overview

This is the last-ditch effort phase. Most spawning mechanics stop, but cleanup failures become lethal.

The Weapon Trap

When Eriak reaches 5% health, he heals based on the number of weapons still active:

1 weapon active = 1% heal
2 weapons active = 2% heal
3 weapons active = 3% heal
4 weapons active = 5% heal
5 weapons active = 8% heal

This heal repeats each time he hits 5% health, potentially extending the fight indefinitely if weapons aren't killed.

Add Explosions

For each percentage threshold below 5% (4%, 3%, 2%, 1%), Eriak explodes a portion of remaining non-weapon adds
If any adds remain when he dies, all of them explode
If the puzzle is still unsolved, additional adds spawn to explode

Critical Strategy:

Kill all weapon adds before phase 5 if possible
Solve the puzzle completely to prevent additional spawns
Eliminate all adds from prior phases to avoid dangerous explosions
The fight can end quickly if weapons are dead and the puzzle is complete

Stage 6: Resolution

{Secret!, but the raid is won This is post raid story.}

Achievements

Complete additional challenges for special recognition:

Master of Foresight: Solve the water sort puzzle before Eriak begins casting Doom
Five-Fold Challenge: Allow all five weapons to remain alive when triggering Eriak's last-ditch effort at 5% health
Perfect Execution: Prevent the last-ditch effort entirely by killing all weapons before the 5% threshold

Tactical Whirlwind Slash PBAE damage to non-grouped players Spread out, manage positioning
Sword Storm Area denial zones Avoid the zones, navigate carefully
Weapon Adds Independent threats with varied abilities Kill or charm them strategically
Desire Switch Makes adds charmable Charm adds to strip Eriak's buffs
Greed Switch Prevents Doom Accept mana cost and melee slow penalties
Doom of the Blacksmith Massive zone-wide damage Use Greed switch or survive via healing
Water Sort Puzzle Ongoing threat system Solve racks to remove spawn points

Final Tips

Communication is key: Call out weapon locations, puzzle progress, and add targets
Adapt to the phase: Each phase brings new threats; be ready to pivot strategies
Manage your mana/resources: The Greed penalty makes resource management critical
Cleanup matters: Weapons and adds left alive in phase 5 will cost you the kill
The puzzle is not optional: Solving it completely makes the final phase dramatically easier

Prepare yourself for a battle against a god who embodies cunning itself. Victory requires mastery of multiple systems working in harmony.

Please make it REALLY random, not countered by "/tar Eriak_Zek04"
Yes, I accounted for that. It actually spawns in a random order, and those numbers are incremented in order of spawn. (the original spawned them all at once, so it was consistent) The spawning happens faster than players can see, but it is sequential. (just sequential at computer speed.)
There is a tell, but it is a tell that probably takes at least some decent number of seconds, depending on things. I might be able to fix that tell, but not sure I should? And I am not currently saying what it is.

This might be unpopular, but is it possible to not include the Key Mechanics Summary for t2 and t3 raids? Way more fun to learn the counters on your own
I put them in spoiler blocks (at least on this post)
Note that, for this raid at least, those counters are one method and fairly generic. Some mechanics have multiple ways to avoid, and the one I suggest may not be best for your Raid group.

EMOTE: xxxxxxxxxxx (action.)

EMOTE: xxxxxxxxxxx (action.)

EMOTE: xxxxxxxxxxx (action.)

EMOTE: xxxxxxxxxxx (action.)

EMOTE: xxxxxxxxxxx (action.)

BACK TO TOP OF CATEGORY                         BACK TO TOP OF PAGE

--------------------------------------------------------------------

LORE

Lore is from / based on Daybreak expansion release information, Producer's Letters, per Dev postings and / or  Beta Forum Info.

PRE-RELEASE

(Producer's Letters)

Mithaniel Marr and Rallos Zek remain entrenched in negotiations to end their conflict, yet the Truthbringer's focus falters. A growing unease pulls at him, distracting him from the weighty negotiations. Should his worries be justified, the champions of Norrath will soon be called upon.

Strange things are happening in the demiplanes. Fortune's wheel is spinning wildly, lifting the unlucky and casting down the fortunate. Is something meddling with fate?

.........................

In the uneasy calm following the gods’ brief but brutal war, Mithaniel Marr and Rallos Zek struggle to forge a truce. Yet even as they negotiate the end of open conflict, Mithaniel’s focus fractures. A shadow clings to his thoughts, an unspoken fear for his sister, Erollisi Marr. Something has changed in her, something he cannot ignore. When he finally speaks, his voice carries a weight that shakes even the divine: Scorn has returned. 
 
As adventurers begin their search, the first signs are subtle, then unmistakable. Across the lesser planes, chance itself twists unnaturally. Simple gambles collapse into disaster. Once‑reliable odds warp into impossibility. Victories slip away as though guided by an unseen hand. The very fabric of luck feels poisoned, bent toward failure by a force both deliberate and unseen. No one can yet explain how or why, only that the pattern is spreading. 
 
With the gods distracted, fate unraveling, and Scorn’s influence rising, the path ahead grows darker by the hour. The champions of Norrath must step forward once more, not knowing whether fortune will favor them, or betray them at every turn. 

AMANRANTH, PLANE OF LOVE

Not all is right with the Plane of Love. Mithaniel Marr has been concerned about his sister, however his attention is divided with the ongoing negotiations in the Plane of Tranquility. He has opened a portal to his sister's plane, and seeks your assistance in finding out what is going on, along with one of his lieutenants.

On first glance, there's nothing wrong with Amaranth or her humble little hamlets. But every rose has its thorn. Her dryads and treants have started to turn, and her eternal hunting grounds have become more dangerous. Cracks to other planes have erupted, spewing their influence on the people around. Love is changing. It's a roll of the dice as to why.

Each hamlet captures each element of love. Selfless, pragmatic, brotherly... Some are more affected by Scorn than others. Watch your back.

SERENDYL, PLANE OF LUCK

Serendyl, the Plane of Luck, did not start as it is now, but "spun into shape" by the will of Xev Bristlebane, God of Mischief and Fortune. It's a realm not ruled by law or order, but by the chaotic weave of chance. Over centuries, it has attracted those obsessed with odds... gamblers, grifters, dreamers, and the damned.

Many who enter seek to curry favor with Xev, but few are noticed. Those who find success may be changed forever; those who fail often become cautionary tales, absorbed by the shifting sands of "Fortune’s Fall" or lost in the glittering madness of "Victor’s Vantage."

AVARICE, PLANE OF GREED

Having gained some insight from the Plane of Love and Plane of Desire, the next step is find Torvonnilous. Has he also received one of the trinkets? Getting to him will be difficult, and you'll need to raise your standing amongst many ambitious minions of the Lord of Greed.

Avarice, the city itself, is multi-tiered based on one's social and economic standing. Any progression by the inhabitants is temporary, like an ongoing game of musical chairs, and you'll be immediately pulled into its game.

The beautiful forest has been over-logged and causing the area to be barren as a result. A mine in the northwest is mined by untiring undead. A lake of gold has claimed far too many who have drowned in its depths seeking shimmering deposits underneath.

Just one more. One more log. One more ore. One more pelt. One more tax. Taxing us into the ground. One more eviction. One more.

BEDLAM, PLANE OF MADNESS

Bedlam is a broken city within the Plane of Madness, a place where reality has long since lost its meaning. Monstrosities wander the streets, strange sights shift at the edge of your vision, and a cacophony of voices echoes throughout the zone. Here, nothing is quite as it seems, and what appears familiar may become something entirely different when you look again.

This is not a place someone willingly comes to of their own accord. Yet, through circumstance—or perhaps simple bad luck—you have found yourself here. Home to Vazaelle Kaleine, the Mad, Bedlam holds secrets that have remained buried beneath its fractured streets. Something has changed within the city, and the effects of those changes are impossible to ignore. Now, you must uncover what has happened, and perhaps more importantly, discover what Bedlam is becoming.

Tread carefully. The Plane of Madness has a way of getting inside your head, and Bedlam is no exception.

Look into the mirrors, but not for too long. You might not like what looks back.

EMBERHEART, PLANE OF DESIRE 

xxxxxxxxxxxxxxxxxxxxxxxxxxxxxxxxxxxxxxxxxxxxxxxxxxx

AVERNESS, PLANE OF GUILE 

Guile is the place of ultimate purposeful deception. The place for those clever enough to outsmart their opponents that also have the will to do just that. This is their afterlife, the place they go as reward for their lives lived as the trickiest, most devious, people around. Just because someone is tricky doesn't mean they are evil, though finding a kind-hearted con man in the world is rare.

In their afterlife they continue to sharpen their minds, honing their skill against the very best. As you might imagine, this makes the Plane of Guile a very competitive place. The stakes are rarely life or death. Here the stakes are usually status related or to gain advantage over someone. Rarely is the reward for "winning" or outsmarting someone physical, and if they are they are mostly inconsequential.

Averness appears much like a simple large city. Districts that serve different needs: shops, houses, crafters, teachers... everything one might need. The city is all of that. It's citizens, on the other hand, are anything but. Purchasing a simple meal or tankard of ale could end up with the customer losing every coin in their purse. It could also mean that the proprietor gives the meal away free. Every transaction is a chance to outwit someone. Subtly tricking, charming, or even killing an opponent earns one power and prestige.

That was when their was a lord in the city, when Guile was present. However, Eriak has been gone for countless decades and much of the subtlety has bled from these interactions. Now it can be considers a coup if one can manage to ambush someone in a alley, or manage to lift their purse and escape through the crowd. Simple thievery and thuggery now pass for guile. Many citizens simple remain indoors as much as they can, venturing out only when they must. The various clans have lost their guiding purpose. The Serenity (ninja) have become killers for hire (not that they weren't before, but now they are mostly open about it), the merchants guild have raised prices openly, and the guild of thieves (The Moonlight) just thump people on the head in alleys and take their stuff.

BACK TO TOP OF CATEGORY                         BACK TO TOP OF PAGE

--------------------------------------------------------------------

GAME / EXPANSION CREDITS

Recognitions and credits for all involved with developing and creating EverQuest, for the current and past expansions, can be seen by clicking the 'Credits' button at the bottom of the Server Select Screen and then viewing the 'Current Expansion' or the 'Previous Expansions' tab.

They can also be found in your EverQuest Directory (credits_current.txt & credits_previous.txt).

A huge thank you to all involved!

BACK TO TOP OF PAGE

.

If you note any errors, misspellings, item name errors, misinformation or anything that needs addressing on this page -- PLEASE let me know via an in-game EQ Message (Bonzz on the Bertoxxulous server), or post on Bonzz's Discord Server!

HOME

This Page Last Updated October 10, 2026.

This fan site is created and provided free (uncompensated, no ads, no sponsors, no registration / log-in), by Bonzz of Bertoxxulous. Images / graphics / sounds on this web site are in-game (EverQuest) captures, originate from Sony / Darkpaw / Daybreak Games (EverQuest) and / or with permission from others (if any). Some graphics may be modified (re-sized, cropped, etc.) from their original form. Any pages that play sounds / music, are intentionally set at low volume. Most of them are under two (2) minutes or less, and should play once and then stop. If any sound / music continues to loop (play over and over), let me know! EverQuest is copyright / trademark / owned / operated by Darkpaw Games, which is owned / operated by Daybreak Games, which is owned / operated by Enad Global 7.