RAID, RAID, RAID
Where to find them and how to do them!
It's time for the raid to begin... then raid some more and raid again! - Bonzz

RAID, RAID, RAID
Raid, Raid Raid are special events, first added in 2009 during the 10th Anniversary (but are not actual Anniversary events).
These temporary events are raids (or a group mission, in one case) that sends players to a set of sequential targets / zones (from older expansions) by 'zone hopping' instance to instance.
The idea is to defeat every target before time expires, as fast as possible, in order to get a progressively better reward (noted below).
These events have been inconsistently offered at different times of the year.
However, in recent times, Death, Death, Death (group) has been activated around July / August of each year, while Dragons, Dragons, Dragons & Giants, Giants, Giants (raids) have been activated around November of each year.
The Dragons, Dragons, Dragons event, originally, had a 'leader board' maintained by EverQuest, for raids that beat the event (all targets) in the fastest times.
--------------------------------------------------------------------
Search Bonzz's Site by typing a keyword(s) in the box below.


--------------------------------------------------------------------
!!!QUICK LINKS!!!
Death, Death, Death (Group) (2014) Dragons, Dragons, Dragons (Raid) (2009) Giants, Giants, Giants (Raid) (2009)
.
DEATH, DEATH, DEATH (Group)
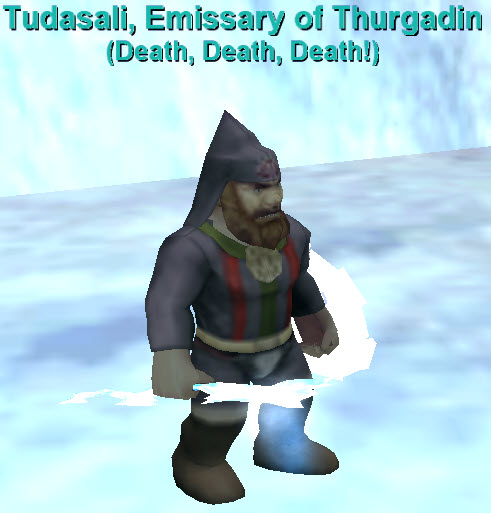
1) GREAT DIVIDE: You are looking for Tudasali, Emissary of Thurgadin , who is near the guard shacks by the river (area of /waypoint -1055, 120)
This is a group Monster Mission (you can get it with one (1) Player, but you will not be able to ge very far).
A full unboxed group is strongly recommended.
This event has a one (1) hour timer.
There does not seem to be a replay timer.
.
2) SET-UP / INFO: This group event will take your to a number of zones, where the goal is to kill as many of the twenty-two (22) targets as you can, before the one (1) hour timer runs out.
- The event is very challenging form the start, as you are in a lower level (Level 50) 'Monster' ('Classic' Class) form.
- As a Monster Mission, each Player will need to pick one (1) of the fourteen (14) available 'Classic' Level 50 Player classes offered (no Beastlord and no Berserker).
- Only one (1) of each Player Class is allowed. Choose wisely.
- Zone in (say 'Continue to Tudasali, Emissary of Thurgadin) to set-up inside the Mission (AA's, Hot Buttons...) and then hit the 'Save' Button in your 'Monster' AA window.
- Once set up, drop the Mission and get it again, to reset the timer.
- Then go back in, Load your saved set-up ('Load' button in the AA Window) and get going! This way, no delay caused by setting-up.
- When each target is defeated, Tudasali, Emissary of Thurgadin can be found in the nearby area (on Find).
- Target and /say Continue to Tudasali, Emissary of Thurgadin to get telported to the next event.
- If you straggle behind, Tudasali, Emissary of Thurgadin will always teleport you to the currently active (undefeated) event.
- The twenty-two (22) targets are supposedly in their original form, to include Level and abilities (except the step of 2,400 Coldain MoB's).
- There will be a spawned chests at Tudasali, Emissary of Thurgadin, for each target is killed.
- NOTE: Items inside the chests do have class restrictions, but they can be upgrades with focus effects, for what your character may currently have.
- This event is not called 'Death, Death' Death for no reason. You will die a lot!
- After a death, there will be a delay of about 15-ish seconds before you can respawn.
- You will respawn at currently active event, where you died.
- When you respawn, run right back in!
- Do this every time... this event does earn it's name, for sure.
- Don't worry, as a Monster mission, you do not lose any experience.
3) STRATEGY TIPS: While I have yet toi beat this event, I can offer some personal opinions on what I have seen...
- Worrying about who is tanking is a non-issue.
- With all the deaths, if you get aggro, just tank it until you die.
- A Healers (CLR, DRU, SHM...) are not very useful.
- They can't keep up and run out of mana fast.
- Players will die constantly Cleric, or no Cleric.
- Casters (ENC, WIZ, MAG, NEC) don't seem to be much help either.
- While some can send in one (1) pet (before they die), they also run out of mana fast.
- An Enchanter 'might' help with slow?
- Beastlords can send a Pet and Melee, so they can be useful.
- Melee Capable Classes may be the best option in my opinion (SK, RNG, PAL, WAR, MNK, ROG, BRD).
- They don't run oput of mana and can DPS until they die.
- Base Strategy? Do DPS until you die, respawn, run back and do it again!
- The ol' 'Throw Corpses At It' strategy!
- Don't wast time! If you are first to a target, go ahead and engage it!
- Give a level of consideration to each targets abilities (see below), otherwise it can sometimes seem like a futile effort!
- Forget Buffs! Buffing makes no difference!
- Don't waste the time or mana!
- DoT's & Curses can be ignored!
- Don't worry about cures and heals!
- Don't waste that effort / mana!
- Pulling Targets are a distance from the zone-in location (which is also where you respawn), towards / to the zone-in location, can potentially save time related to the back and forth respawn-and-run-back time.
- Player who gets agrro should immeduately run towards the zone-in location and get as far as they can.
- Other Players should not attack, so that the target is not delayed (by aggro changes) in getting to the zone-in location.
- If a Player dies before they get to the zone-in spot, another Player should take their place until the target is pulled to the zone-in spot.
- Killing a target at or near the zone-in spot can save a lot of time on Players running back and also having more time doing DPS on the target.
.
4) MULTIPLE INSTANCED ZONES:
The targets, in sequence, are:
A) South Ro: Ancient Cyclops;
- Usually North-ish of the Wizard spire.
- Doesn't seem to have any special attacks.
B) South Ro: Cazel;
- Usually near Tudasali, Emissary of Thurgadin.
- Doesn't seem to have any special attacks.
C) Nagafen's Lair: Lord Nagafen;
- Can Fear.
- Has 200-Range AoE 500 HP DD with dispel.
- Belly Caster.
D) Permafrost Keep: Lady Vox;
- Can't be reasonably pulled from where she is.
- Be wary not to fall into the secret pit traps (most maps have them marked) on the way!
- Can Complete Heal herself.
- Has a 1-Tic Fear.
- Has 200-Range AoE 500 HP DD with dispel.
- Belly Caster.
E) Plane of Fear: a dracoliche;
- Has a 100 HP DD with 8-Tic 100 HP DoT (45-Seond Delay).
- Has a 1.5K Lifetap.
- Pull it towards the zone-in, if you can.
F) Dreadlands: Gorenaire;
- Pull it towards the tunnel where you zone-in.
- Aggros from a mile away!
- Belly Caster.
- Can Complete Heal itself.
- Has a 1-Tic Fear.
- Has a 750 HP DD with a 5-Minute 70% Slow.
G) Old Sebilis: Trakanon;
- Has a frontal Lifetap (if you aren't the tank, don't be in front).
- Pull it towards the bridge as far as you can, to where you zone-in.
- Belly Caster.
- Has a .5-Second Stun with 4-Tic Blind (use map to get around).
- Has a 1.2K HP DD with a 30-Minute 150 HP DoT.
- Banishes Players back to the zone-in spot.
H) Velketor's Labyrinth: Velketor the Sorcerer;
- Pull near the steps (it can't go past them, but it's closer to the zone-in).
- Belly Caster.
- Can summon.
- Has a 622 HP DD.
- Has a 602 HP DD with a 4-Tic Root.
- Has a 3K HP DD.
- Has an 8-Second Stun with 990 HP DD.
I) Kael Drakkel: King Tormax;
- Pull it to the zone-in area (saves a LOT of running and increases DPS time).
- Doesn't seem to have any special attacks.
J) Veeshan's Peak: Phara Dar;
- Pull it out fo the room to the zone-in spot.
- Belly Caster.
- Can Complete Heal more than once.
- Has a 12-Second Stun with 900 HP DD.
K) Kael Drakkel: Derakor the Vindicator;
- Pull it to the zone-in area (saves a LOT of running and increases DPS time).
- Doesn't seem to have any special abilities.
L) Skyshrine: Lord Yelinak;
- This is the event most people never get past... and with good reason!
- Rooted in place (can't drag it towards the zone-in, which is a veritable mile away).
- Summons.
- Has ridiculous regen.
- Fire Attacks & Harm Touch Lord Yelinak do big damage.
- Has a 2 HP DD with Push Back & Push Up (make sure your back is to the back wall or gate... or you will be in the water).
- Has a 250-Range AoE 300 HP DD with a 1-Minute 50 HP DoT.
- Has 600 HP DD with 1-Minute 80% Snare.
- Belly Caster.
- Players with aggro should summon tank! This helps you, and others, live longer and able to do more DPS over time!
M) Temple of Veeshan: Vulak'Aerr;
- Belly Caster.
- Has massive Regen.
- Has a 250 HP DD with a 3-Minute -40% Attack Speed & 20 HP DoT.
- Can summon.
- Has a 350-Range AoE for 50 HP DD).
- Possibly weak to magic attacks? (Unclear)
N) Kerafyrm's Lair: the four (4) warders (Hraashna the Warder, Nanzata the Warder, Tukaarak the Warder & Ventani the Warder);
- Hraashna the Warder has a 500 HP DD with a 2-Minute 500 HP DoT & 65% Snare.
- Hraashna the Warder has a 1-Hour -15 Attack eith a 4 HP DoT.
- Nanzata the Warder has 500 HP DD with Dispel.
- Tukaarak the Warder has a 200-Range AoE 250 HP DD with a 3-Tic Silence.
- Ventani the Warder has has a 200-Range AoE 250 HP DD with a 3-Tic Silence.
- Ventani the Warder has a 200_Range AoE 750 HP DD with a 5-Minute -70% Attack Speed.
O) Kael Drakkel: Statue of Rallos Zek;
- Doesn't seem to have any special attacks.
P) Kael Drakkel: The Avatar of War;
- Doesn't seem to have any special attacks.
Q) Zone: Doomshade;
- Doesn't seem to have any special attacks.
R) Zone: Quarm;
- Can dispel.
- Has a 500-Range AoE 1-Minute -20 SpelL Damage, -280 Attack with a 100 HP & -50 Mana DoT.
- Has a 500-Range 3K HP DD.
- Has a 500-Range AoE 5-Tick 20% Snamre with a 100 HP DoT.
- Has three (3) variant 500-Range AoE 3K HP DD.
- Has a two (2) variant 500-Range AoE 15-Tic 500 HP & -50 Mana DoT.
S) Zone: 2,400 Coldain MoB's (aka 'Coldain's armies') (they are easy kills, but time is ticking);
T) Talk to Tudasali, Emissary of Thurgadin.
.
5) REWARD: The reward for this is Achievement related... each of which give you a suffix title.
They are:
- Death, Death, Death!: Decimator (defeat A to C, above) ('Decimator of Death');
- Death, Death, Death!: Defeater (defeat D to F, above) ('Defeater of Death');
- Death, Death, Death!: Demolisher (defeat G to I, above) ('Demolisher of Death');
- Death, Death, Death!: Destroyer (defeat J to L, above) ('Destroyer of Death');
- Death, Death, Death!: Doombringer (defeat M to O, above) ('Doombringer of Death');
- Death, Death, Death!: Deathdealer (defeat P to R, above) ('Dealer of Death').
TOP
.
DRAGONS, DRAGONS, DRAGONS (Raid)
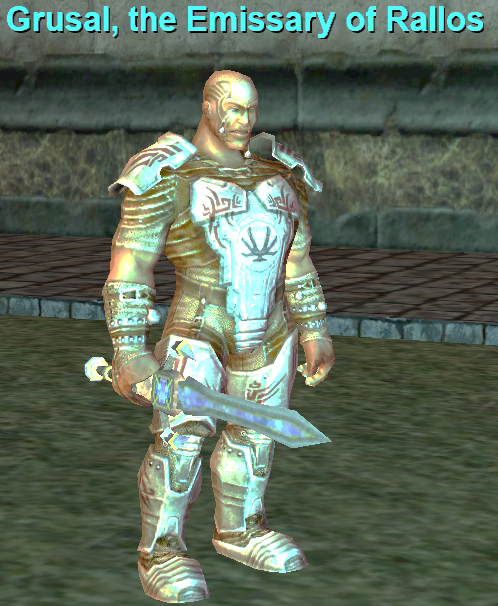
1) PLANE OF KNOWLEDGE: You are looking for Grusal, the Emissary of Rallos, who is near the guild lobby (area of /waypoint -435, 1235),
This is a raid event and you will need at least three (3) to fifty-four (54) Level 75-plus Players to get the event.
To enter the instance, say 'Die.'
.
2) RAID EVENT: This group or raid event will take your to a number of zones, to kill a series of twenty-three (23) Dragon targets. as fast as you can.
After you defeat each Dragon, you will find Grusal, the Emissary of Rallos in the nearby area, who will teleport you to the next target (say 'Continue'), or you can go back to the Plane of Knowledge (say 'Leave').
If anyone dies and / or gets left behind, they can go back to the Plane of Knowledge and talk to Grusal, the Emissary of Rallos to catch up at the current target.
Players will be teleported reasonably close to each target, but using maps can help.
Each target is the 'original' version... same level, same abilities, and so forth. The raid does get harder as your progress target to target.
- Nagafen's Lair: Lord Nagafen;
- Permafrost Keep: Lady Vox;
- Plane of Fear: a dracoliche;
- Dreadlands: Gorenaire;
- Old Sebilis: Trakanon;
- Veeshan's Peak: Phara Dar;
- Skyshrine: Lord Yelinak;
- Temple of Veeshan: Vulak'Aerr;
- Kerafyrm's Lair: the four (4) warders (Hraashna the Warder, Nanzata the Warder, Tukaarak the Warder & Ventani the Warder);
- Plane of Time: Quarm;
- The Ascent: Kessdona the Enlightened;
- Thundercrest Isles: Yar'Lir the Living Storm;
- Relic, the Artifact City: Ashenback, Shar Drahn & Tsikut;
- Accursed Nest: Vishimtar the Fallen;
- Ashengate North: Lethar (the second encounter);
- Tinmizer's Wunderwerks: Big Bynn I;
- Crystallos: Brood Mother Visziaj & Kerafyrm the Awakened.
.
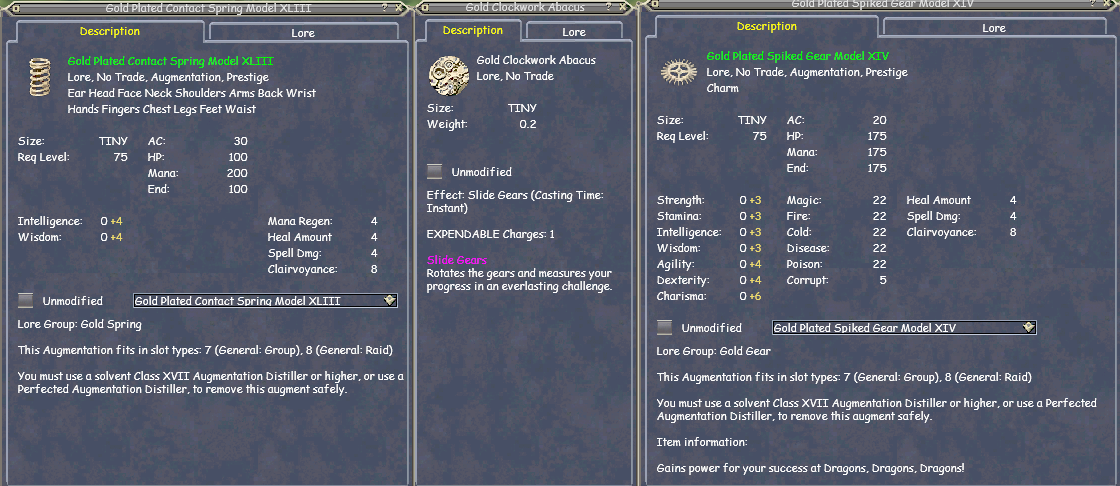
3) REWARD: The reward for this is a 'Gold Plated' Augmentation that the entire raid gets.
The Gold Plated Contact Spring Model I up to a Gold Plated Contact Spring Model XLIII is awarded depending on how far you get.
There is also a Gold Plated Spiked Gear Model I up to a Gold Plated Spiked Gear Model XIV that is based on how many years your account as been active.
If you do not get the maximum version of the Augmentation, you can do this again in an effort to upgrade it. If successful, you can destroy the Augmentation you have and a for the better aug you earned.
If you did not get a new aug, or you have destroyed your aug you had, you can talk to Distribution Facilitator XCV in the Plane of Knowledge, who is a clockwork near the Guild Lobby (/waypoint -270, 1375) to get a new one. He will give you a Gold Clockwork Abacus. Be sure to destroy your old 'Gold' augs (one or both of them) before you click the Gold Clockwork Abacus (the Augs are Lore).
NOTE: Distribution Facilitator XCV has 'Living Legacy' under it's name, but he does serve the needs of Death, Death, Death as well.

TOP
.
GIANTS, GIANTS, GIANTS (Raid)
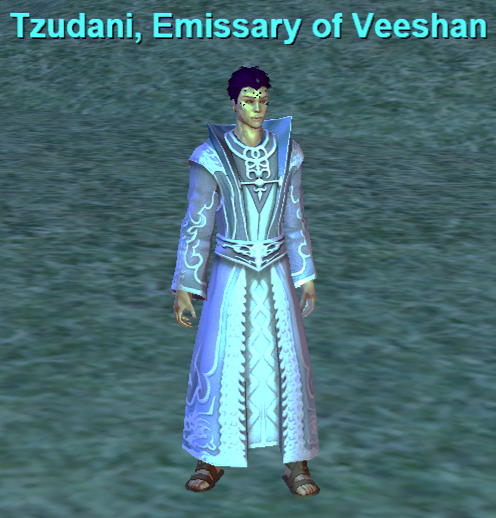
1) PLANE OF KNOWLEDGE: You are looking for Tzudani, Emissary of Veeshan, who is a Drakkin near the Guild Lobby (/waypoint -375, 1290).
This is a Level 50-plus raid / group event (no Mercenaries), for one (1) to fifty-four (54) Players.
Hail Tzudani, Emissary of Veeshan and follow along to get this raid event.
When ready, say 'Die,' to zone in.
.
2) RAID EVENT: This raid event will take your to a number of zones, where you are to defeat the noted 'Giant' in each instance.
After defeating each target, you will find Tzudani, Emissary of Veeshan nearby, who will teleport you to the next target (say 'Continue'), or you can go back to the Plane of Knowledge (say 'Leave').
If you are in a raid where everyone rushes ahead and you are lagging behind a zone or two, or die, go back to the Plane of Knowledge and zone back in via Tzudani, Emissary of Veeshan to catch up.
The sequential zones / targets are:
- South Ro: Ancient Cyclops;
- Velketor's Labyrinth: Velketor the Sorcerer;
- Kael Drakkel: King Tormax; Derakor the Vindicator; the Statue of Rallos Zek; & the Avatar of War;
- Umbral Plains: Doomshade;
- Vex Thal: Aten Ha Ra;
- Wall Of Slaughter: Hulcror;
- The Broodlands: Grel Strongboom;
- Sporali Caverns: Antraygus;
- Arcstone: Colossus of Skylance;
- Icefall Glacier: Avalanche;
- Frostcrypt, Throne Of The Shade King: Beltron the Shade King;
- Solteris: Solar Construct;
- Steam Factory: Mining Behemoth;
- Korafax, Home Of The Riders: Pallorax;
- Citadel Of The World Slayer: Lord Brekt, Rider of Discord.
.
3) REWARD: The reward for this raid is given to all participants in the raid, even if they were not present in zone when each target was defeated.
The reward is a progressively better Augmentation (Platinum Plated Worm Pinion Model I to Platinum Plated Worm Pinion Model XX), depending on how many targets were defeated and the speed at which they were defeated.
The reward comes in the form of a Platinum Clockwork Abacus, which can be clicked to grant you the version of the Augmentation that your raid earned.
If you do not get the maximum version of the Augmentation, you can do the raid again in an effort to upgrade it. If successful, you can then destroy the Augmentation you have and a then click the new Platinum Clockwork Abacus for the better aug you earned.
If you did not get a new Platinum Clockwork Abacus, or you have destroyed your Augmentation, you can talk to Distribution Facilitator XCV in the Plane of Knowledge, who is a clockwork near the Guild Lobby (/waypoint -270, 1375) to get a new Platinum Clockwork Abacus. Be sure to destroy your old 'Platinum' Aug before you click the Platinum Clockwork Abacus (the Augs are Lore).
NOTE: Distribution Facilitator XCV has 'Living Legacy' under it's name, but he does serve the needs of Raid, Raid, Raid as well.


TOP
If you note any errors, misspellings, item name errors, misinformation or anything that needs addressing on this page -- PLEASE let me know via an in-game EQ Message (Bonzz on the Bertoxxulous server), or post on Bonzz's Discord Server!
HOME
This Page Last Updated August 1, 2026.
This fan site is created and provided free (uncompensated, no ads, no sponsors, no registration / log-in), by Bonzz of Bertoxxulous. Images / graphics / sounds on this web site are in-game (EverQuest) captures, originate from Sony / Darkpaw / Daybreak Games (EverQuest) and / or with permission from others (if any). Some graphics may be modified (re-sized, cropped, etc.) from their original form. Any pages that play sounds / music, are intentionally set at low volume. Most of them are under two (2) minutes or less, and should play once and then stop. If any sound / music continues to loop (play over and over), let me know! EverQuest is copyright / trademark / owned / operated by Darkpaw Games, which is owned / operated by Daybreak Games, which is owned / operated by Enad Global 7.