


PLANE OF WAR
Where to find them and how to do them!
You will need your own corps, to defeat the Plane of War! - Bonzz
The Plane of War was added to the game via patch in April 2, 2014, during the 15th Anniversary events (at the time of the Call of the Forsaken expansion).
The Plane of War was added as a permanent year-round zone, not a temporary Anniversary event. However, there are 15th & 16th Anniversary Events related to the Plane of War, to include a Raid (added May 7, 2014).
Reportedly, the Plane of War was a zone originally intended for The Planes of Power expansion, but was never added to the game.
The Plane of War was intended designed for full groups of Level 100 Players (Level 65 Required to enter), and the named (rare) MOB's were intended for 2-groups of Players. In short, while the quests are mostly solo / group type quests, you are likely to need help to get them done and / or expedite the process.
The Plane of War requires in-zone progression, to get from one area of the zone, to another. The quests in this zone are old-school style quests, meaning there is no task window. You have to keep track and generally figure things out as you go along. The only way to sort of keep track of your Plane of War progression is by way of Achievements (under the Planes of Power expansion) and the items you have in inventory, that are needed for the quest(s).
You might also utilize the in-game /note feature to simply make a note of where you left off!
NOTE: When doing these tasks, expect MOB's that can see invis and having to fight your way through it all.
NOTE: Expect to clear area's in order to interact with quest NPC's and / or complete task steps.
NOTE: You will receive a number of "character flags" along the way. While a lot of things can be done simultaneously or out of "intended" sequence, there are things that 100% have to be done in the sequence noted below. In short, follow the steps in the order listed, and you should not have any sequence conflicts.
NOTE: As you go along, you may run into named (rare) MOB's. You can kill them if you want to (or, perhaps, have to), but having at least a group with you when doing so, is advisable. The curses (DoT's) they use... normally... can not be cured and can also be pretty nasty.
NOTE: As you go along, any items that you come across that are marked as "Quest" items, go ahead and snatch them up! Most, if not all such items can be acquired / looted in advance.
NOTE: Some of the items you need and / or acquire are often tradeable, meaning you can potentially get them from other Players.
NOTE: Some of the items you need and / or acquire are sometimes 'No Storage,' meaning you have to carry them around until you need them (no banking these items).
NOTE: Some of the items you need and / or acquire are sometimes 'No Zone,' meaning you that if you leave the Plane of War (zone out, teleport out, die and go to bind, succor...), these items will go poof! Gone! You will have to get them again!
NOTE: If you ever forget what step you are on, you can search this page for any item you have (Control F), which should get you to the general point (step) where you left off!
--------------------------------------------------------------------
LORE
The Long-Hidden Plane of War Beckons to You with Eternal Battle.
It is a rare honor that the Zeks entertain the challenges of mortals in their realm.
“Here you stand, on the brink of war. Before you enter the Plane, you should ask yourself, ‘Am I prepared?’” – Commander Gorok
The Plane of War, the domain of Rallos Zek, is where fighters of all races selected by the Warlord god battle eternally in his honor. This plane was sealed off long ago from mortal intervention, to be opened at a later time when the citizens of Norrath were deemed to be a worthy challenge.
“Do you hunger for blood? Is your appetite only satiated by senseless war? The battle never ends on this plane.” – Jorgar the Pacifist
The gates to Rallos' realm have remained sealed so long that most mortals have simply forgotten that his plane has been left despoiled all this time. Now the rumors of the Warlord’s domain becoming accessible have reached the ears of god-slaying adventurers. Veteran adventurers are already preparing to trek into this new yet strangely familiar place, to reap the rewards of plunder. Will you be one of them?
In celebration of the 15th Anniversary of EverQuest, there will be a special mission and raid available to adventurers for a limited time. The special level-scaling mission will be available to players that are level 65 and higher that want to get a taste of the Plane of War experience. In addition, raiders will be able to rally their forces and fight their way into the Plane of War to engage Tallon and Vallon Zek in combat!
Be warned, they are the personification of war. The brothers Zek employ both strategy and tactics when facing their foes. It will not be an easy fight.
Are You a Challenge Worthy of a Zek?
Before entering The Plane of War, you should ask yourself, ‘Am I prepared?’
Will you fight well enough to earn a reward in addition to the respect of those that call The Plane of War their home?
--------------------------------------------------------------------
Search Bonzz's Site by typing a keyword(s) in the box below.
--------------------------------------------------------------------
>>>BY QUEST SERIES (PRE-FLAGS MAY APPLY)<<<
FIELD OF STRIFE KATKA - THE UNWORTHY REFINER DYRGINAL JUDICATOR
CASTLE TAMREL CASTLE RULNAVIS GRANDMASTER'S TOWER EVENT
.
>>>BY QUEST (PRE-FLAGS MAY APPLY)<<<
A COLOSSAL TASK A NEW COLONEL IN TOWN CASTLE RULNAVIS CASTLE TAMREL DEFENDING THE CASTLE
DESERVING OF BATTLE EDMUUND'S PLIGHT ESCAPE TO TAMREL FIELD OF STRIFE & THE MINES (Narikor)
GAINING FACTION WITH CASTLE RULNAVIS GAINING FACTION WITH CASTLE TAMREL KATKA'S CAUSE
TACTICAL STRIKE THE GRANDMASTERS TOWER THE TAMREL TRIALS
.
PLANE OF WAR ACHIEVEMENTS
Conqueror of The Planes of Power (an optional step) Planes of Power Explorer (an optional step) Keys of War
The Plane of War Traveler Mercenary of The Plane of War Partisan of The Plane of War
Savior of The Plane of War Beyond the Zekarian Castle Tamrel The Favor of Vallon
Castle Rulnavis The Favor of Tallon The Antechamber of Drunder
Conqueror of the Plane of War Hunter of The Plane of War
.
PLANE OF WAR ANNIVERSARY EVENTS
LIQUID COURAGE (16th Anniversary) WAR GAMES (15th Anniversary, includes the Raid)
.
1) CRAFTING: You will need a Stonewood Compound Bow.
This item is crafted.
You can acquire it from other players or you can make it yourself.
To make it yourself (with no fails and / or component loss), you will need:
.
2) PLANE OF WAR: Head into the Plane of War from the cave in the Plane of Tranquility (first monument on the left).
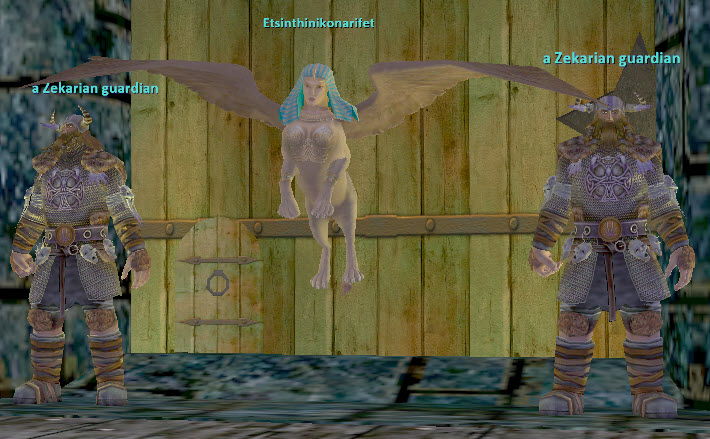
Carefully make your way to Etsinthinikonarifet, who is by the drawbridge at the big wall that separates the 'Zekarian' (aka 'Field of Blood,' the area you are in) from the 'Field of Strife' (the area inside the gate).
Get right up on Etsinthinikonarifet, hail him and follow along (/say tithe).
You should get a message about receiving a character flag.
.
3) PLANE OF JUSTICE: You are here to find Zayenaekk.
Zayenaekk is in a cell / room to the far east (go around the center area, through the west door on the back side there, take a right and into the first door you see).
Hail Zayenaekk and then say (exactly), Za`ye`na`ekk.
Then say (exactly), What tithe does Ets`in`thini`konar`ifet seek?
.
4) KORASCIAN WARRENS: You are here to find Murdunk. He in the far north section of the map.
NOTE: Make sure your Ogre language Skill it at 100 for this step! If it isn't, get to work!
In the Ogre language hail him and follow along.
Then say "Speak to Zayenaekk."
.
5) VEGARLSON, THE EARTHE BADLANDS (aka Plane of Earth): You are here to acquire an item.
Head to the doorway in the far south, that leads into the tunnels.
Look around for a ground spawn and pick it up (Murdunk's Massive Bastard Sword).
.
6) KORASCIAN WARRENS: Head back to Murdunk.
NOTE: Make sure your Ogre language Skill it at 100 for this step! If it isn't get to work!
Now give him Murdunk's Massive Bastard Sword.
He will give you the Sphinx Chamber Key.
.
7) TOSKIRAKK: You are here looking for Zayenaek, who is in the far southwest of the zone (you need the Sphinx Chamber Key you just got to get to Zayenaek).
Switch back to the Common language, then hail Zayenaek and say, "I seek the blessing of your sister."
You will get a Zekarian Bow Schematic. Open it open it up to read it and then scribe it.
.
8) PLANE OF WAR: Now you need a Zekarian Diamond (No Trade).
It can drops primarily from the "named" or "mini-named" MOB's in the first ('Zekarian' or 'Field of Blood') area of the zone (i.e. Diaku Redeemer, Gurak Tyrant & Sheartooth Captain), but it can drop from normal trash MOB's as well.
Kill until you get one.
.
9) CRAFTING: Once you have a Zekarian Diamond, combine it with the Stonewood Compound Bow (see Step 2) to make a Zekarian Stonewood Compound Bow (Fletching 15).
.
10) PLANE OF WAR: Head back to Etsinthinikonarifet.
Hail Etsinthinikonarifet and hand in the Zekarian Stonewood Compound Bow.
You are now able (flagged) to enter the "Mines" (aka Narikor) area and the "Field of Strife" area (click the small door behind Etsinthinikonarifet) of the Plane of War.
.
11) PLANE OF WAR: Head into the mines area of the Plane of War.
To get there, go in by way of the Plane of Tactics (Drunder, Fortress of Zek). In the Plane of Tactics (with levitation), run up the steps, float down into the pit and to the right doorway, then go down the right hallway to the far room (where the lava river is).
Jump in the lava and swim to the right into the Plane of War.
You are here looking for Katka, she should be on Find. She is deep inside the mines (head into the tunnels, take your 2nd right, then 1st right, then 1st left and then 1st left again).
Hail and follow along with Katka and she will give you a Secret Note to Sorayn, Secret Note to Mickorn and a Secret Note to Selynse.
.
12) PLANE OF WAR: Selynse is not far away. She is south, down the tunnel from Katka.
Hail Selynse and follow along, as needed.
Give the Secret Note to Selynse to Selynse. You will get Selynse's Black Powder.
.
13) PLANE OF WAR: Sorayn is located down the west tunnel and then to the north at a dead end.
Hail Sorayn and follow along, as needed.
Give the Secret Note to Sorayn to Sorayn. You will get Sorayn's Necklace Chain.
.
14) PLANE OF WAR: To find Mickorn, head down the south tunnel and take the 2nd right.
Hail Mickorn and follow along, as needed.
Give the Secret Note to Mickorn to Mickorn. You will get a Narikor Ore Bucket and a Narikor Rock Pick.
.
15) PLANE OF WAR: You now have several activities to pursue, which you can do simultaneously.
.
16) PLANE OF WAR: Now for some combines.
.
17) PLANE OF WAR: Head back to Sorayn and turn in Necklace of Narikor Teeth.
You will get Sorayn's Pledge of Support.
.
18) PLANE OF WAR: Head back to Selynse and turn in Selynse's Black Powder the and the Narikor Guardian's Ring.
You will get Selynse's Note to Jolris.
.
19) PLANE OF WAR: Head to Forgetender Bolgorn. He is located near the zone-in, in the room before the large forges.
Give him the Filled Narikor Ore Bucket and you will get a Narikor Forge Insignia Cloak.
.
20) PLANE OF WAR: Head back to Mickorn and give him the Narikor Rock Pick and the Narikor Forge Insignia Cloak.
You will get Mickorn's Pledge of Support and get back the Narikor Forge Insignia Cloak.
.
21) PLANE OF WAR: Head to Cooper Jolris, who is at the first intersection as you go into the mines from the zone-in.
Give him Selynse's Note to Jolris, and you will get a Barrel Bones.
Then head to the room where the forges are located, near the zone-in. You may want to clear the area.
Go to one of the anvils in the room and click the Barrel Bones.
You will get an Empty Narikor Barrel.
.
22) PLANE OF WAR: Head back to Selynse and turn in the Narikor Forge Insignia Cloak and the Empty Narikor Barrel.
You will get Selynse's Pledge of Support.
.
23) PLANE OF WAR: Head back to Katka.
Give her Mickorn's Pledge of Support, Sorayn's Pledge of Support and Selynse's Pledge of Support.
You will get a Proclamation of Rebellion.
.
24) PLANE OF WAR: Now find an unimpressed slaver (they can be found in several locations in the mine) and click the Proclamation of Rebellion on it.
Be ready for an unimpressed slaver to attack you, when you do this.
These MOB's are place holders for Jergamund the Slaver.
If he doesn't appear in short order, head to the next an unimpressed slaver and repeat the process.
Go back, later, to the same locations, to see if, Jergamund the Slaver has spawned (a tracker can prove useful for this).
If he has, kill him to get a Captured Slaver (No Trade).
Then head back to the forge room near the zone-in. Stand near a forge (specifically, the hammer of the forge) and click the Captured Slaver. A corpse called "An Example" should appear on the ground and Jergamund's Bloody Head should appear on your cursor.
.
25) PLANE OF WAR: Head back to Katka.
Hand in Jergamund's Bloody Head and the Proclamation of Rebellion.
You will get Katka's Call to Arms.
.
26) PLANE OF WAR: Head back to Selynse and turn in Katka's Call to Arms.
You will get Explosive Narikor Barrel.
.
27) PLANE OF WAR: Head back to the room near the zone-in where the forges are.
Stand between the two forges and click the Explosive Narikor Barrel, and be ready for a fight.
As the fuse burns on your bomb, four (4) a shade of judgment will spawn and attack. Kill them ASAP.
You need to loot (3) Token of Reclaimed Honor.
NOTE: If you fail this encounter, you can try again.
.
28) PLANE OF WAR: The Diviner of the Worthy is nearby, in the next room back towards the zone-in.
Give the (3) Token of Reclaimed Honor and the Explosive Narikor Barrel to the Diviner of the Worthy.
.
29) PLANE OF WAR: Refiner Dyrginal is located in the forge room, not far from the zone-in.
Hail him and follow along.
.
30) PLANE OF WAR: A Greedy Miner is located further into the mines (head straight down the western tunnel, take your 2nd right and then your 1st left.)
Kill him to get a Dirt Covered Ore (No Trade).
.
31) PLANE OF WAR: Head back to Refiner Dyrginal and give him Dirt Covered Ore.
You will get a Grungy Object.
Then, hail him and follow along.
NOTE: If you did not acquire (3) Shining Gem of Striking (see Step 15), you will need to do so now.
Give the (3) Shining Gem of Striking and the Grungy Object to Refiner Dyrginal.
You will get a Grungy Symbol.
.
32) PLANE OF WAR: Now head to Krepp the Augurer. He is down the mining tunnel (from the zone-in), at the dead end after taking your first left.
Hail him and follow along, then give him the Grungy Symbol.
You will get a Grungy Mark.
Give the Grungy Mark back to him (you get it back), then follow along with his response.
You will get Krepp's Tagging Marker.
Now find any "Kobold" MOB, fight it to at least 35% and then click Krepp's Tagging Marker on it. Then lead it (it should follow you) back to Krepp the Augurer, who will finish it off (you may need to clear a path first, before you do this).
NOTE: The "Kobold" MOB needs to be a good distance away from Krepp the Augurer. If it was originally too close, he will not kill it.
Now give the Grungy Mark back to Krepp the Augurer.
You will get a Mark of Rallos Zek.
.
33) PLANE OF WAR: One you are ready, click the Mark of Rallos Zek.
This will cause a furious legionnaire to spawn and attack. Kill it and loot a Token of War (No Trade).
Once it is dead, a Herald of War will appear nearby.
Hail the Herald of War and follow along, then turn in the Token of War.
34) PLANE OF WAR: You are here looking for The Judicator.
Kill trash MOB's to spawn him. The best place to do this might be in the far right corner of the "Field of Strife" area (pulling the boars and other nearby MOB's).
NOTE: As you kill trash MOB's, they can potentially drop Vallon Soldier Insignia (No Trade); or Tallon Soldier Insignia (tradable); or Tallon Captain Insignia (tradable). You want to loot as many of each as you can. You will need them later.
It can take a lot of trash kills to spawn The Judicator (at least 30 to 40). There are emotes that happen to forewarn of his arrival (such as hearing "flapping wings" in the distance, and the "sound of wings" growing louder). It is believed that MOB kill counts to spawn The Judicator may not be group-specific, putting your group in direct competition with any other group killing trash MOB's in the "Field of Strife" area.
The Judicator appears to "challenge" the specific group that spawned him. If you kill a The Judicator that you did not spawn, you will not be able to loot any items from it, until the timer runs down (for 2+ minutes). Meanwhile, the group that did spawn the The Judicator that you killed, can immediately loot the drops as they have dibs.
However, when you spawn The Judicator, it will be right on top of you. When fighting The Judicator, avoid using pets. The Judicator takes particular offense to any Player using pets, instead of fighting for themselves, and he will focus his full attention on that player (not good for most pet classes). The Judicator can hit for 20K, has an huge amount of Hit Points and also uses and AoE knock back about every 30 to 60 seconds. The Judicator also has an aura that negates defensive abilities, so players other than the tank, may want to used ranged attacks.
Once The Judicator is dead, it can drop some nice loot, but the main thing you are after is The Warlord's Blessing (Lore, No Trade). He only drops one (1) of these, so you will have to spawn and kill him multiple times for other Players in your group, if they also need it.
.
35) PLANE OF WAR: Now head to the west side of the "Field of Strife," the bridge that leads up to a castle door. Use the The Warlord's Blessing on the door to gain access to Castle Rulnavis!
.
36) PLANE OF WAR: Repeat Step 34!
.
37) PLANE OF WAR: Now head to the east side of the "Field of Strife," the bridge that leads up to a castle door. Use the The Warlord's Blessing on the door to gain access to Castle Tamrel!
.
38) PLANE OF WAR: You will need to have at least Kindly faction (check your /faction) with Castle Tamrel to do the next task.
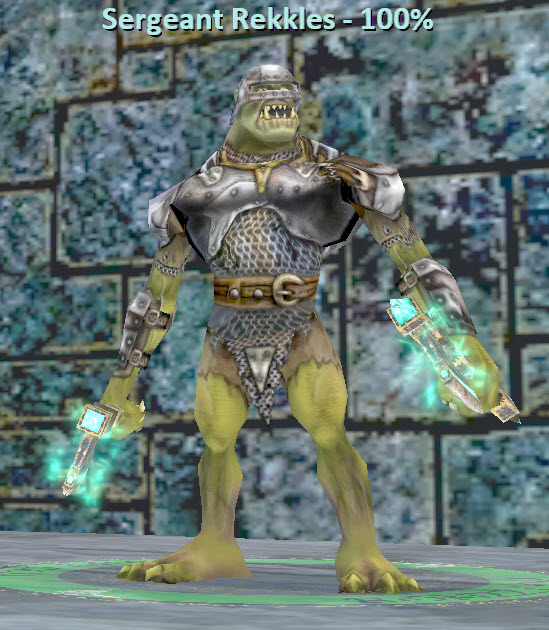
If you don't have enough faction, you can kill 'hendin' and 'rulnavian' MoB's in the 'Field of Strife' area, to loot Tallon Soldier Insignia (tradable) and turn them in to Sergeant Rekkles in Castle Tamrel (inside the gate, but outside and to the right of the main castle doors). You will need at least Dubious /faction with Castle Tamrel to do these hand-ins. You will get +10 /faction with Castle Tamrel per hand-in, until you reach Indifferent, after which, they will only be worth +2 /faction with Castle Tamrel per hand-in.
If you don't have good enough faction to do the hand-ins, just keep killing 'hendin' and 'rulnavian' MoB's to build it up, slowly (+1 /faction with Castel Tamrel per kill). Sergeant Rekkles will stop accepting Tallon Soldier Insignia once you reach Kindly /faction with Castel Tamrel.
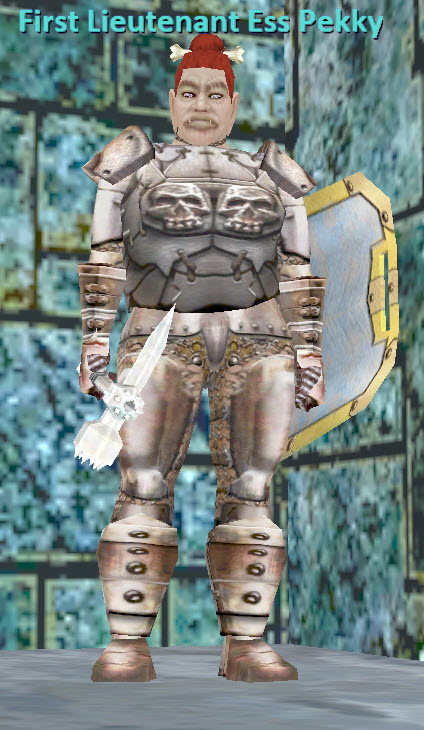
You can also kill 'hendin' and 'rulnavian' MoB's in the 'Field of Strife' area, to loot Tallon Captain Insignia (tradable) and give them to Lieutenant Ess Pekky, who is just inside the actual Castle (Castle Tamrel). You will get +10 /faction with Castle Tamrel per hand-in, until you reach Kindly, after which, they will only be worth +2 /faction with Castel Tamrel per hand-in. You need to be at least Indifferent /faction with Castel Tamrel to do these hand-ins. If you aren't you need to keep killing 'hendin' and 'rulnavian' MoB's to build it up, slowly (+1 /faction with Castel Tamrel per kill), and / or keep doing hand-ins Sergeant Rekkles with (noted above).
Additionally, once you have Max Ally /faction with Castle Tamrel, hail Sergeant Rekkles and follow along, or just try saying 'Help.' He will give you Sergeant Rekkles' Spare Flask and Sergeant Rekkles' Tactical Analysis.
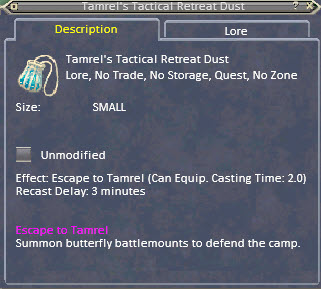
Then go give the Sergeant Rekkles' Spare Flask and Sergeant Rekkles' Tactical Analysis to Lieutenant Ess Pekky. You will then get Tamrel's Tactical Retreat Dust, which is a click item that will teleport you directly to Lieutenant Ess Pekky (a 2-second cast), but only while you are in the Plane of War. This item is also a 'No Zone' item, but you can easily get another as just noted above!
While you are here, you may as well also acquire the following items (you will need them later, so you may as well get them now):
.
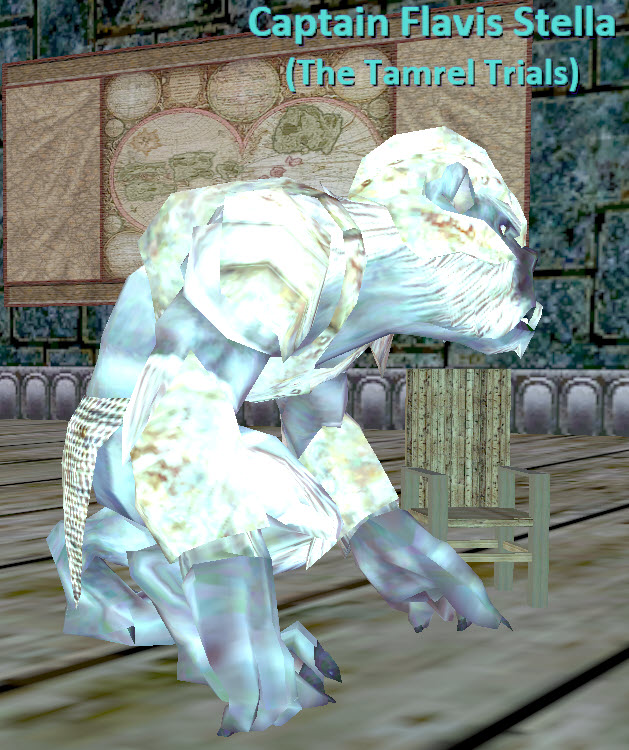
39) PLANE OF WAR: You are looking for Captain Flavis Stella, a kobold, who is in 'Castle Tamrel' on the second floor (northeast room).
He gives three trials, that are all timed events -- you have ten (10) minutes to beat then -- that start immediately and happen right there in that same room!
While this is a solo task, you may want a group to help you.
Hail him and follow along, or just try saying 'First,' to get three options (level of difficulty, but none are truly that hard) for the first trial.
If you say 'sneak' (the easy option), two (2) a sleepy minotaur will attack. Kill them.
If you say 'call' (mid-range difficulty), three (3) a battle minotaur image will attack. Two (2) an orc ally will try to help you, but they will likely die pretty quick. Kill the three (3) a battle minotaur image.
If you say 'explosives' (hardest option), four (4) a charging minotaur. Kill them.
.
40) PLANE OF WAR: You are looking for Captain Flavis Stella, a kobold, who is in 'Castle Tamrel' on the second floor (northeast room).
He gives three trials, that are all timed events -- you have ten (10) minutes to beat then -- that start immediately and happen right there in that same room!
While this is a solo task, you may want a group to help you.
Once you have defeated his first trial, him and he will give you three options (level of difficulty, but none are truly that hard) for the second trial.
If you say 'wait' (the easy option), two (2) a sneaky goblin will attack (kill them). Four (4) an orc ally will try to help you, but they will likely die pretty quick.
If you say 'magical' (mid-range difficulty), a powerful giant image will attack. Kill it.
If you say 'rush' (hardest option), four (4) a sneaky goblin will attack. Kill them.
.
41) PLANE OF WAR: You are looking for Captain Flavis Stella, a kobold, who is in 'Castle Tamrel' on the second floor (northeast room).
He gives the first two trials, that are all timed events -- you have ten (10) minutes to beat then -- they start immediately and happen right there in that same room!
While this is a solo task, you may want a group to help you.
Once you have defeated his first trial, him him and he will give you three options (level of difficulty, but none are truly that hard) for the third trial.
If you say 'poison' (the easy option), two (2) a poisoned Hendin image will attack (kill them). Two (2) an orc ally will try to help you, but they will likely die pretty quick.
If you say 'behind' (mid-range difficulty), three (3) a distracted hendin image will spawn, kill them. Two (2) an orc ally & two (2) a bloodtusk ally image will try to help you, but they will likely die pretty quick.
If you say 'directly' (hardest option), three (3) a Hendin image will spawn. Kill them. Four (4) an orc ally will try to help you, but they will likely die pretty quick.
Once done, hail Captain Flavis Stella again, to finish up, and he will send you to General Ugor Gronno.
.
42) PLANE OF WAR: You will now need Warmly /faction with Castel Tamrel in order to do this task (see Step 38, if you need to work on faction).
Once you are at Warmly faction, head over to Lieutenant Ess Pekky and hail her, or just try saying, 'Ogre tactics,' to get Ess Pekky's Tactics Book.
.
43) PLANE OF WAR: If you did not loot four (4) Broken Weapon (see step 38), go get them now.
You are looking for General Ugor Gronno, an ogre, who is in 'Castle Tamrel' on the second floor (south room).
Hail him and then give him the four (4) Broken Weapon. He will give you Ugor's Storage Box.
.
44) PLANE OF WAR: If you did not loot six (6) Sulfurous Iron Ore (see step 15), go get them now.
Once you have six (6) Sulfurous Iron Ore in hand, head into Castle Rulnavis (the other castle) to kill six (6) a Rulnavian machinist and / or a golem machinist, then click one (1) of your Sulfurous Iron Ore on each corpse.
.
45) PLANE OF WAR: While you are here, kill MoB's to get some drops.
You need one (1) each of an Excellent Two-Handed Sword, Excellent Heavy Cestus, Excellent Heavy Mattock and an Excellent Heavy Spear (they are all tradable), that drop from a golem smith.
You will need one (1) Things I Seen (a scroll that can drop from any MoB).
Once you have all four of the weapons, put them inside Ugor's Storage Box and combine them to make Ugor's Sealed Storage Box.
.
46) PLANE OF WAR: Head back to General Ugor Gronno.
Give Ugor's Sealed Storage Box to General Ugor Gronno, and he will give you Ugor's Signet.
Now, as odd as it sounds (considering his last response and that he just gave you one of the items), give Ugor's Signet and Things I Seen to General Ugor Gronno.
He will give you Arcanist's Ignitor (click effect of 'Start the Fire').
.
47) PLANE OF WAR: Head back to Castle Rulnavis and make your way to the upstairs library.
You will see stacks (piles) of books. Feel free to clear MoB's around the book piles, but most definitely click the Arcanist's Ignitor, to set them on fire, and sooner or later, Araneae the Clever will spawn and attack you.
Kill Araneae the Clever and loot Araneae's Strategies.
.
48) PLANE OF WAR: Head back to General Ugor Gronno.
Give Araneae's Strategies and Arcanist's Ignitor to General Ugor Gronno to finish up!
NOTE: General Ugor Gronno mentions giving you a 'key to the tower' but he doesn't actually give you a key. This is actually the flag for access to 'Rallos' Tower' -- or the 'Grandmaster's Tower' -- (which is the chessboard room behind the door, in the mid-north wall of the zone).
.
49) PLANE OF WAR: You will now need at least Warmly (perhaps ally) /faction with Castle Tamrel in order to do this task (see Step 38, if you need to work on faction).
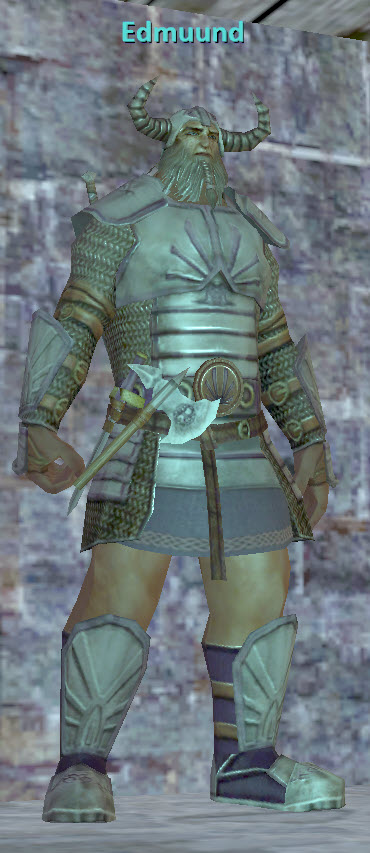
Once you have enough faction, head back into Castle Rulnavis (yes, the opposite castle again), to find Edmuund (a giant), who is inside on the west side, in the first room to the south.
Hail Edmuund and follow along... he doesn't give bracketed text to click, so /say Worthy then /say Test.
If you did not acquire four (4) Heart of the Colossus earlier, see Step 38 and go get them now.
Once you have them, give the four (4) Heart of the Colossus to Edmuund. He will give you a Display Case.
If you did not acquire four (4) Champion Blade earlier, see Step 38 and go get them now.
Once you have them, combine the four (4) Champion Blade inside the Display Case, to make a Sealed Display Case.
Lastly, give the Sealed Display Case to Edmuund.
.
50) FROSTCRYPT, THRONE OF THE SHADE KING: Head to the far end of this zone into the 'maze' area.
Then make your way to any corner, target the floor panel, a block of ice, and destroy it.
Drop down into the lower level and look for a ground spawn Gorod's Medallion, and pick it up.
This should spawn Icecore. Kill it and loot Aelfgir's Signet Ring.
.
51) PLANE OF WAR: Head back to Edmuund.
Give Gorod's Medallion and Aelfgir's Signet Ring to Edmuund.
Then /say How forgive? or try /say How did you get here?
Continue to follow along... and /say What about his problem? and then /say The Plane of Tactics, or course.
He will give you Edmuund's Message.
.
52) DRUNDER, FORTRESS OF ZEK (aka Plane of Tactics): Head to the basement, to the right, to the 'Blacksmith' area (where the lava river is... area of /waypoint 1335, 1000, -325).
You should find Soke of Storms (a goblin) up (he should spawn when you get close). If he doesn't, you will have to just wait, or you can try roaming the area and / or killing MoB's in the area, just in case it helps spawn him faster.
When Soke of Storms appears, give him Edmuund's Message, and he will hand Edmuund's Message back to you and ask if you are up to a challenge.
You have as long as fifteen (15) minutes to answer it seems, but when you are ready to give it a go, /say Yes, I accept the challenge to Soke of Storms.
NOTE: If you have a mercenary up, it will be automatically suspended at this point, so don't freak out! However, this encounter is not as easy as it sounds, and a little help from other Players may be needed.
Soke of Storms will now attack you! This is a DPS battle, where you need to get him down to 10% (and live), in a short time span (how long?), where upon he will stop fighting.
If you fail, you can try again, and again until you succeed.
Once Soke of Storms stops fighting at 10% health, follow along with him (/say message) and he will give you Soke's Message.
.
53) PLANE OF WAR: Head back to Edmuund.
Give Edmuund's Message and Soke's Message to Edmuund.
Edmuund will disappear, and Edmuund the Bold will spawn in the next room (to the west).
You need to attack and defeat Edmuund the Bold. While other MoB's will not assist him, it does not appear they will not aggro you, so you may want to clear them aneyway if any are KoS to you.
After you defeat him, the quest is completed.
.
54) PLANE OF WAR: You can start this quest with Dubious /faction with Castle Rulnavis, but will need Amiable faction to complete it. UPDATE: It has been reported this now requires Max Ally faction.
If you don't have enough faction, you can kill 'gindan' and 'tamrelian' MoB's in the 'Field of Strife' area (each MoB is +1 /faction with Castle Rulnavis) and loot Vallon Soldier Insignia (tradable) then turn them in to Captain Dulkot, who is inside the gates of Castle Rulnavis by the main entranceway. You can turn them in at Threatening faction. Each turn in will net you a base +5 /faction with Castle Rulnavis. You will also, reportedly, get an additional +1 /faction with Castle Rulnavis for every 50 Heroic Charisma you have!
.
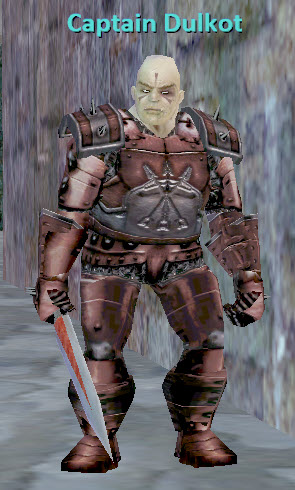
55) PLANE OF WAR: Once you have enough faction, head to Captain Dulkot, who is inside the gates of Castle Rulnavis, by the main entranceway.
Hail Captain Dulkot and he will give you an Alchemy Requisition Request and a Battle Report Ledger.
.
56) PLANE OF WAR: Now head inside Castle Rulnavis to find Alchemist Veryon (a gnome), who is around the bend to the south, as you enter the main area of the first floor.
Give him the Alchemy Requisition Request and he will give you a Potion of Valorous Battle.
.
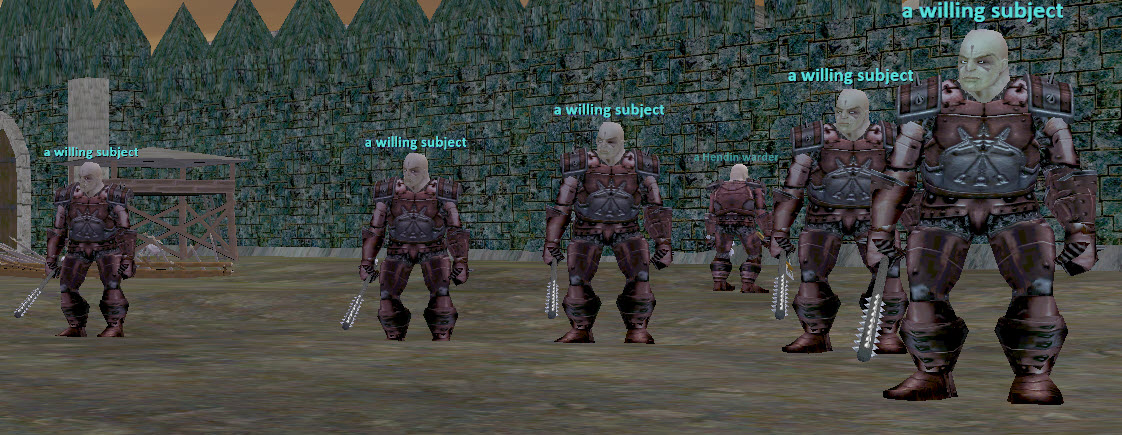
57) PLANE OF WAR: Head out into the middle 'Field of Strife' area. In the northwest corner area, you will see several a willing subject.
Pull 'tamrelian' or 'gindan' MoB's near (right up to) a willing subject and they should battle each other.
As the battle takes place, target a willing subject and click the Potion of Valorous Battle on it.
If a willing subject wins or loses, doesn't matter. Once the battle is over, you should get a Battle Report Page.
Repeat this until you have six (6) Battle Report Page.
Once you have the six (6) Battle Report Page, combine them inside the Battle Report Ledger, to make a Filled Battle Report Ledger.
.
58) PLANE OF WAR: Head back to Captain Dulkot.
Give the Filled Battle Report Ledger and the Potion of Valorous Battle to Captain Dulkot, and you will get a Potion of Dubious Valor.
.
59) PLANE OF WAR: You will need at least Apprehensive /faction with Castle Rulnavis at this point. If you don't have enough Faction, go work on it now (see Step 54).
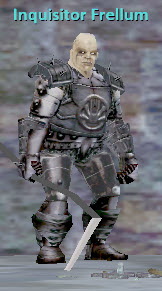
Once you have enough faction, head inside Castle Rulnavis to find Inquisitor Frellum (an ogre), who is in the far south west room.
Give the Potion of Dubious Valor to Inquisitor Frellum, and he will give you a Tempting Wine Cask and a Saboteur Evidence Bag.
Click the Tempting Wine Cask and a wine cask (barrel) should appear nearby (next room). Click the win cask (barrel) then back away.
In short order, a Tamrelian infiltrator or a Tamrelian spy should spawn. Kill it and loot a Tamrelian Spy Cloak.
Keep doing this until you have four (4) Tamrelian Spy Cloak, then combine them inside the Saboteur Evidence Bag to make a Full Saboteur Evidence Bag.
.
60) PLANE OF WAR: Head back to Captain Dulkot.
Give the Full Saboteur Evidence Bag and the Tempting Wine Cask to Captain Dulkot, and you will get a Letter to Gromluk.
.
61) PLANE OF WAR: You will need at least Indifferent /faction with Castle Rulnavis at this point. If you don't have enough Faction, go work on it now (see Step 54).
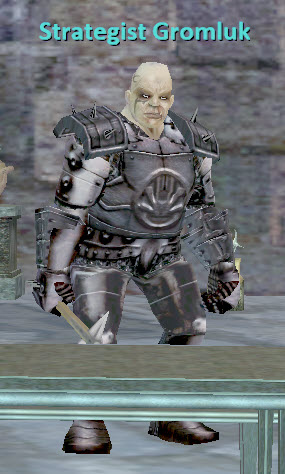
Once you have enough faction, head inside Castle Rulnavis to find Strategist Gromluk (an ogre), who is in the northwest room of the southern set of rooms.
Give the Letter to Gromluk to Strategist Gromluk and he will give you a Rulnavian Library Index.
Now head up to the second floor, to the library area.
Click the Rulnavian Library Index in the following areas (if the click doesn't work, move a little and try again, or face a different direction... north, south or east... these locations are almost in a straight east-west line of one another):
If the click succeeds, you will get a book. The books are Rilnak's Strategic Compendium, Binget's Battle Guide & The Art of Zek.
.
62) PLANE OF WAR: Head back to Strategist Gromluk.
Give the three (3) books (see above) and the Rulnavian Library Index to Strategist Gromluk.
Strategist Gromluk will give you a Writ of Rulnavian Command and a Defensive Report Ledger.
.
63) PLANE OF WAR: Head out into the 'Field of Strife' area, right outside the Castle Rulnavis gate.
Look around for a Rulnavian defender (minotaurs). Click the Writ of Rulnavian Command on them (as many as you see) and they will now follow you around, but there is no real need to move about with them. In short order a Tamrelian charger and / or a Tamrelian rusher will spawn and attack any a Rulnavian defender that you clicked the Writ of Rulnavian Command on.
As the attacking MoB's (the tamrelian) die, you will get a Successful Defensive Report Page. Keep doing this until you have six (6) of them.
Once you have six (6) Successful Defensive Report Page, combine them inside the Defensive Report Ledger, to make a Filled Defensive Report Ledger.
.
64) PLANE OF WAR: You will need at least Amiable /faction with Castle Rulnavis at this point. If you don't have enough Faction, go work on it now (see Step 54).
Once you have enough faction, head back to Strategist Gromluk.
Give the Writ of Rulnavian Command and the Filled Defensive Report Ledger to Strategist Gromluk, and he will give you Burning Tar and a Tar-Proof Bag.
.
65) PLANE OF WAR: Head back out into the 'Field of Strife' to the southwest area, where you will see a number of a Tamrelian assailant and / or a Tamrelian assaulter.
Pull (aggro) either a Tamrelian assailant and / or a Tamrelian assaulter, and DPS it down enough, so that it will take you less than about 45-seconds (for a Tamrelian assaulter) or about 2-seconds (for a Tamrelian assailant) to finish off the MoB in question (this can vary with your Level and DPS).
Once a Tamrelian assailant and / or a Tamrelian assaulter is at low enough health, click the Burning Tar on it, then kill it as fast as possible (before the 'Burning Tar' effect wears off).
Upon success, you need to loot Charred Soldier Bones (from a Tamrelian assaulter) and / or Charred Captain Bones (from a Tamrelian assailant).
Keep doing this until you have seven (7) Charred Soldier Bones and three (3) Charred Captain Bones, then combine them inside the Tar-Proof Bag to make a Bag of Burned Bones.
.
66) PLANE OF WAR: Head back to Strategist Gromluk.
Give the Burning Tar and Bag of Burned Bones to Strategist Gromluk, to finish up.
.
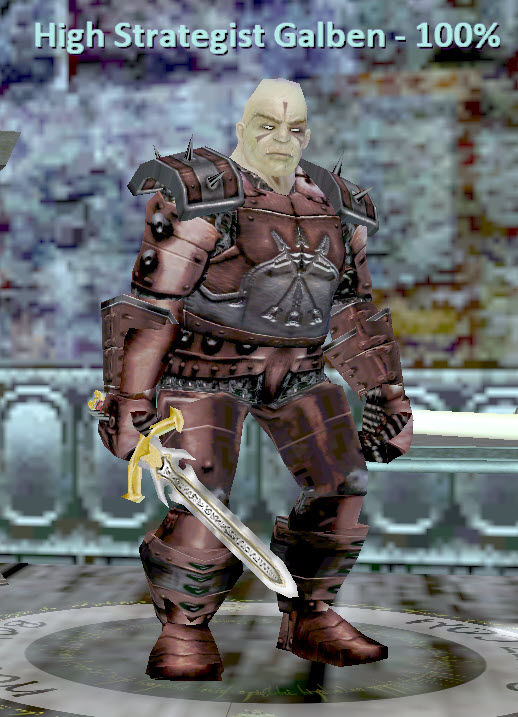
67) PLANE OF WAR: You will need at least Kindly /faction with Castle Rulnavis at this point. If you don't have enough Faction, go work on it now (see Step 54).
Once you have enough faction, you are now looking for High Strategist Galben (an ogre), who is on the second floor of Castle Rulnavis in the library, in a dead end to the northeast.
Hail him and he will give you a Blacksmith's Work Order and a Bowyer's Work Order.
.
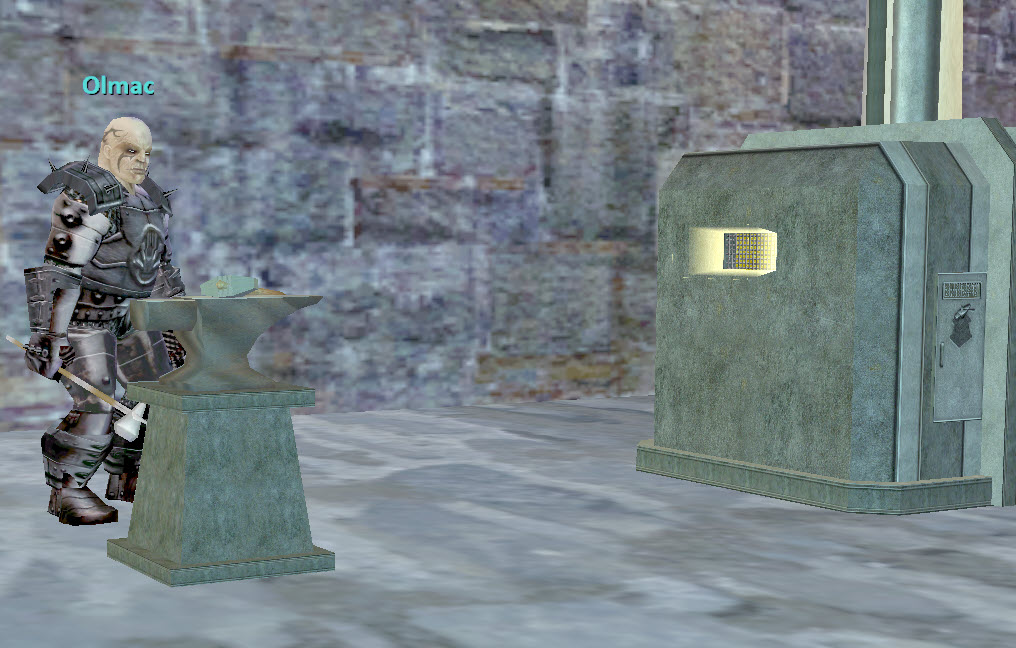
68) PLANE OF WAR: You are looking for Olmac (an ogre), who is also in Castle Rulnavis (just to the northwest as you enter the main area, by a forge).
Give the Blacksmith's Work Order to Olmac and he will give you a Tamrelian Sword Bag and a Tamrelian Armor Bag.
If you did not acquire ten (10) each of Tamrelian Sword Pieces and Tamrelian Armor Pieces (see Step 38), you need to do so now.
Once you have then (10) Tamrelian Sword Pieces, combine them in Tamrelian Sword Bag to make Filled Tamrelian Sword Bag.
Once you have then (10) Tamrelian Armor Pieces, combine them in Tamrelian Armor Bag to make Filled Tamrelian Armor Bag.
Give the Filled Tamrelian Sword Bag & Filled Tamrelian Armor Bag to Olmac, and he will give you an Updated Blacksmith's Work Order.
.
69) PLANE OF WAR: Now you need to find Fletcher Forlen (a tiny wood elf), who is inside Castle Rulnavis, on the far south wall of the first floor.
Give the Bowyer's Work Order to Fletcher Forlen and he will give you a Rulnavian Woodcutter and Kindling Twine.

.
70) PLANE OF WAR: Head out into the Zekarian (aka 'Field of Blood') part of the zone (entrance area) and be ready to spend a bit of time here.
Basically go up near trees and click the Rulnavian Woodcutter while standing near them, and you will see an emote that the click failed, you should try somewhere else, or MoB's have spawned and are now trying to kill you (an angered tree or a Yendan forest servant...)... you will have to kill them. While doing this, the normal trash MoB's can aggro as well.
If you are lucky, you will get a Field of Blood Kindling. You need ten (10) of these.
Once you have ten (10) Field of Blood Kindling, combine them in the Kindling Twine to make a Field of Blood Wood Bundle.
.
71) PLANE OF WAR: Head back to Fletcher Forlen.
Give the Rulnavian Woodcutter and the Field of Blood Wood Bundle to Fletcher Forlen and he will give you an Updated Bowyer's Work Order.
.
72) PLANE OF WAR: Now go back to High Strategist Galben.
Give the Updated Blacksmith's Work Order and Updated Bowyer's Work Order to High Strategist Galben and he will give you a Blacksmith's Requisition and a Blessed Entreaty.
.
73) PLANE OF WAR: Go back to Olmac and give him the Blacksmith's Requisition, and he will give you a Hardened Rulnavian Sword.
.
74) PLANE OF WAR: Now go find High Priest Squelniss (a goblin), who is on the second floor of Castle Rulnavis, in the middle of the south west room.
Give the Blessed Entreaty and Hardened Rulnavian Sword to High Priest Squelniss, who will give you a Blessed Rulnavian Sword.
.
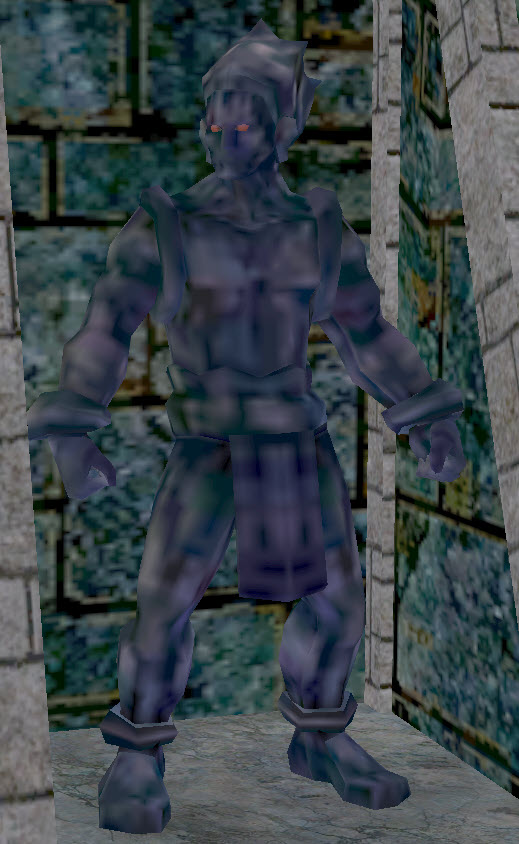
75) PLANE OF WAR: Head back to the Zekarian (aka 'Field of Blood') part of the zone (entrance area).
Click the Blessed Rulnavian Sword on any a Zekarian Colossus, which will cause it to attack you. Kill it and loot the Body of a Colossus.
.
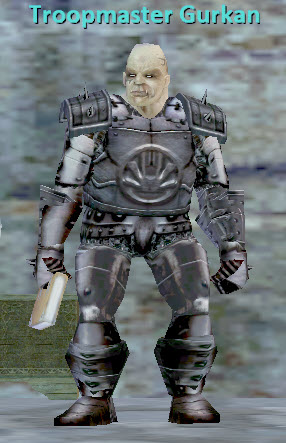
76) PLANE OF WAR: Now go find Troopmaster Gurkan, who is on the south east room on the first floor of Castle Rulnavis.
Give the Blessed Rulnavian Sword and Body of a Colossus to Troopmaster Gurkan, and he will give you a Note to High Strategist Galben.
.
77) PLANE OF WAR: You will need at least Warmly /faction with Castle Rulnavis at this point. If you don't have enough Faction, go work on it now (see Step 54).
Once you have enough faction, head back to High Strategist Galben.
Give the Note to High Strategist Galben to High Strategist Galben to finish up.
.
78) PLANE OF WAR: High Strategist Galben should have given you a Plan for Narikor.
The Plan for Narikor is intended for Katka, but if you followed this guide, you have all ready done the quest series with Katka.
Thus, just hand the Plan for Narikor back to High Strategist Galben and he will give you an Assault Bow Requisition and a Colossus Requisition.
.
79) PLANE OF WAR: Now head back to Troopmaster Gurkan.
Give the Colossus Requisition to Troopmaster Gurkan and he will give you a Strategic Colossus.
.
80) PLANE OF WAR: Run back to Fletcher Forlen.
Give the Assault Bow Requisition to Fletcher Forlen and he will give you an Assault Bow.
.
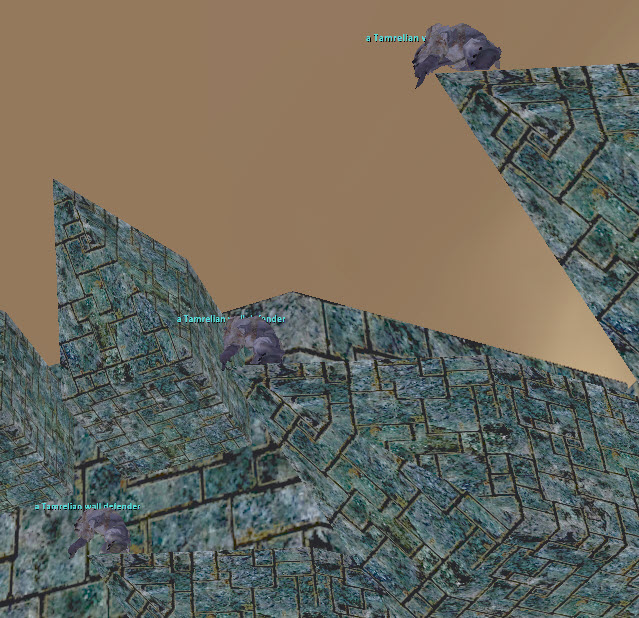
81) PLANE OF WAR: Now head to the 'Field of Strife' outside of Castle Tamrel and you should see a Tamrelian wall defender up on the wall (look up).
You need to kill eight (8) a Tamrelian wall defender by getting in close enough range to target them and then click the Assault Bow on them (one successful click is all it takes).
.
82) PLANE OF WAR: At this point, you may need a capable group (or more) to help you, depending on your Level and abilities, due to the time limit and MoB abilities.
Now you need to move over to the bridge (not on it) to click the Strategic Colossus.
This will cause a possessed colossus to appear and follow you around (like a pet or familiar, you can also buff it... it will fight with you), but it can path in odd ways, so don't get too far away from it (let it catch up). It (a possessed colossus) will only last about an hour as it has limited power, so you need to get moving! Click into Castle Tamrel while a Tamrelian wall defender are still dead (this will not work if they have respawned)!
Inside Castle Tamrel, there are four (4) a shamanic resonance (a crystal shard, floating in the air), that you need to find and destroy.
They are all located on the main floor, one in big room to the south; one in the room just south of that one; one in the back room all most directly west from the entrance; and one in the northeast room. You may additionally have to deal with trash MoB's when you attack them.
They are located in the areas of:
It is the presence of a possessed colossus, that makes a shamanic resonance destructible.
Once the fourth a shamanic resonance has been destroyed, High Tactician Drelg will spawn (area of /waypoint -1525, -1665), which is on the main floor just inside the main room, around the corner to the south.
Once again, the presence of a possessed colossus makes High Tactician Drelg vulnerable to attack. High Tactician Drelg flurries and rampages. He will also summon about seven (7) adds at 95% (1), 60% (1), 40% (2) and 20% (3)... that you will also have to contend with (an honor guard and / or a blood guard... they summon once they are damaged). All of these MoB's can hit 25K, use an assortment of magical attacks, and they are generally immune to mezz / root / snare and they can also summon.
As a note, a possessed colossus also fights... make sure you out DPS a possessed colossus so that the corpse of High Tactician Drelg does not instantly disappear, as you need to loot Drelg's Message.
If you fail, or the corpse of High Tactician Drelg disappears and you don't get Drelg's Message, you can try again (you should still have the Strategic Colossus).
.
83) PLANE OF WAR: Head back to to High Strategist Galben.
Give the Assault Bow, Strategic Colossus and Drelg's Message to High Strategist Galben, to finish up!
.
84) PLANE OF WAR: The Grandmaster is actually one of the 'Hunter' targets for this zone, and is often the hardest one to get, because you need access to 'The Grandmaster's Tower' (the middle door in the far mid-south of the zone).
If you need the kill, but don't have the access, Players that do have access can either invite you to their group, or their raid. Once they kill The Grandmaster, you will get credit (even if you are not in the zone)!
This 'tower' is just a room with a Chess Board on the back side of it.
If you do have access, here is how this event works (in very generic terms):
.
1) PLANE OF WAR: You are looking for Jorgar the Pacifist, who is near the northwest corner of the zone (/waypoint 2575, -500).
This is a raid event that requires at least six (6) Characters (54 maximum).
Hail and follow along with Jorgar the Pacifist, or just try saying 'Serious' to get this raid.
Then say 'Prepared' to Jorgar the Pacifist, to zone into the instance.
.
2) PLANE OF WAR: You are here to face Tallon Zek & Vallon Zek (both are Level 103).
This raid is a hardcore variant of the raid event from Rathe Council Chambers, in the Seeds of Destruction expansion.
Before you start, make sure everyone gets into the room with Tallon Zek & Vallon Zek, as the doors will close once it starts.
To start the event, simply talk to either Tallon Zek & Vallon Zek and say, 'Challenge.'
Here is what to expect / do:
.If you note any errors, misspellings, item name errors, misinformation or anything that needs addressing on this page -- PLEASE let me know via an in-game EQ Message (Bonzz on the Bertoxxulous server), or post on Bonzz's Discord Server!
This Page Last Updated December 5, 2025
This fan site is created and provided free (uncompensated, no ads, no sponsors, no registration / log-in), by Bonzz of Bertoxxulous. Images / graphics / sounds on this web site are in-game (EverQuest) captures, originate from Sony / Darkpaw / Daybreak Games (EverQuest) and / or with permission from others (if any). Some graphics may be modified (re-sized, cropped, etc.) from their original form. Any pages that play sounds / music, are intentionally set at low volume. Most of them are under two (2) minutes or less, and should play once and then stop. If any sound / music continues to loop (play over and over), let me know! EverQuest is copyright / trademark / owned / operated by Darkpaw Games, which is owned / operated by Daybreak Games, which is owned / operated by Enad Global 7.